Creating events can be that easy
In this whitepaper we show you how to easily create events within the eworx Marketing Suite – with the event assistant that guides you step by step through the process.
Which opportunities do I have to create an event?
In events you have different opportunities to create events. In the following we show you the different options and how they work.
Create a new event
When clicking the “New” button you can choose to create a new event. The event creation process has a new look & feel but all settings are the same as you may know them. In the first step you have to fill in the basic information about your event:
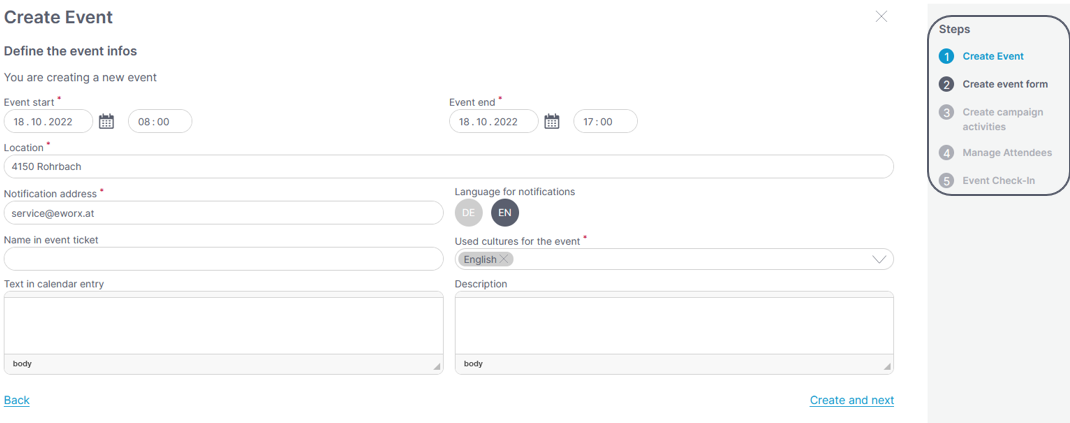
After filling out the data you get to the event dashboard by clicking “Create and next”. Here you see all the information to the event you created and can adjust them. Read more about the event dashboard here.
Create an event with assistant
You also have the opportunity to choose “Create new event with assistant” when it comes to event creation. The assistant now guides you through the creation process.
On the right border you can see the steps that you have to go through in order to create a new event – the steps you already completed are marked green, the current step is marked blue.
Now, fill in the basic information about your event and complete step 1 by clicking “Create and next”.

The next step is the event form. You can select a form to copy or create a new form.
If you want to choose an existing form, just select the respective one from the drop down menu.
Important: The drop down menu only shows the forms that have the status “online” in the system. When you choose one of them the original form remains as it is and the system creates a copy of the form.
A new event form can be created in the form editor as you know it.

After finishing the second step you get to the event dashboard again and the assistant shows you the next steps.
Create an event out of an existing one
As a third opportunity you can create an event out of an event that already exists. Choose the option in the drop down menu and a list of all existing events will appear. Now you can select the event you want to use as template for the new one.
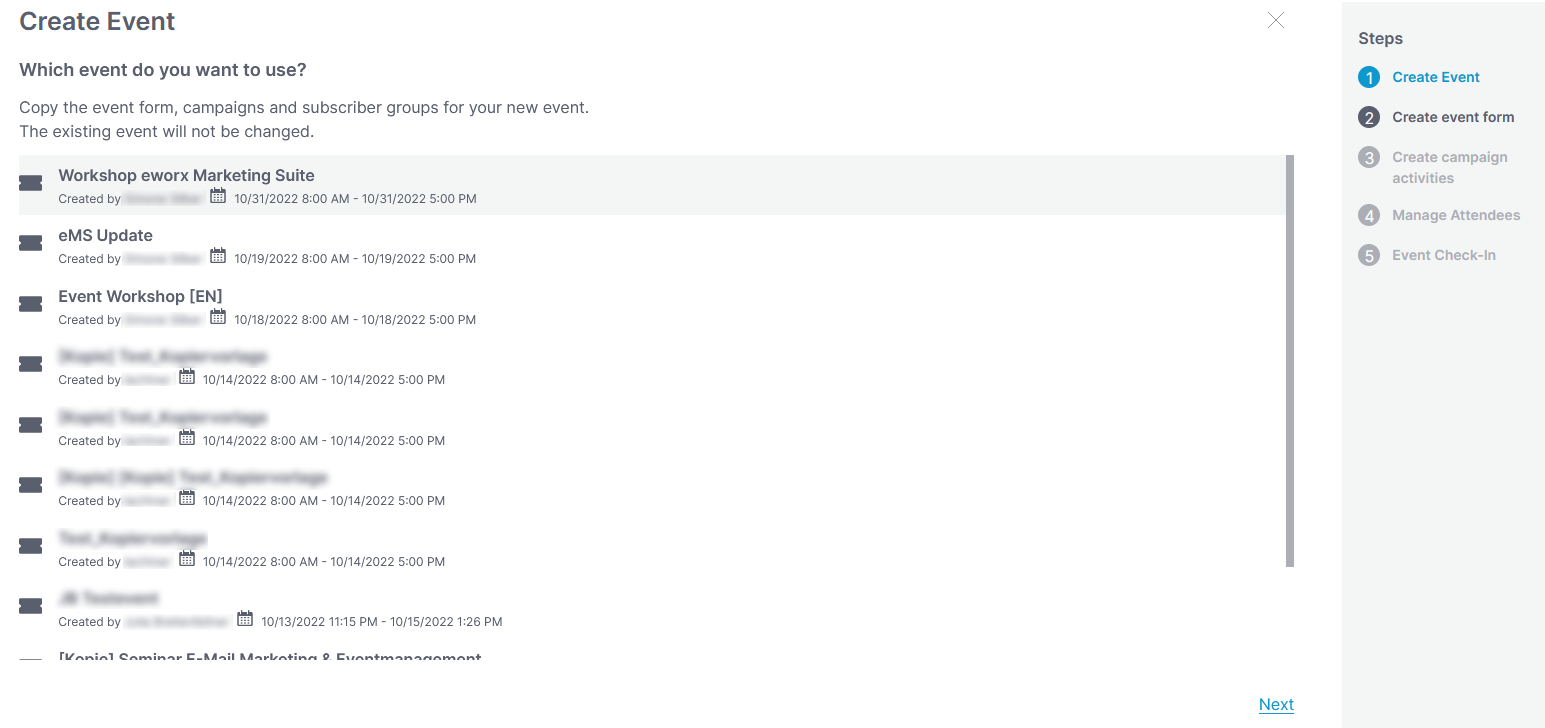
Alternatively you can skip the selection and copy the respective event by clicking “Copy” on the 3-points-menu of the event in the event overview.

Now, name your event and choose which information from the original event you want to assume.

After you made the settings event creation is the same as with the assistant: you fill in the basic information or adjust them, name the event and get back to the event dashboard.
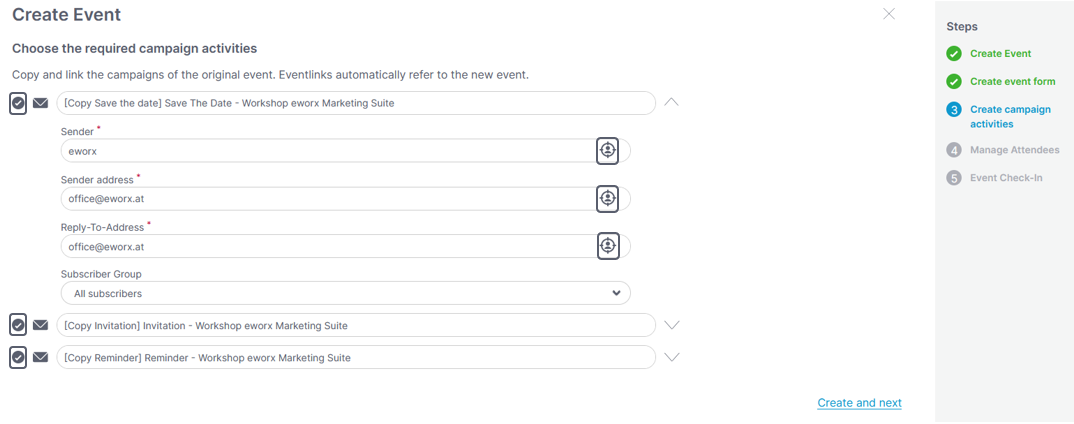
Important: When you choose the option “Copy one or more campaign activities” you first get to the overview of campaign activities.
Here you have to select the respective activities and name your campaign. Adjust sender and addresses (you can also use personalization here) and choose the respective target group. By clicking “Create and next” you will get back to the event dashboard.
Which settings am I able to make on the event dashboard?
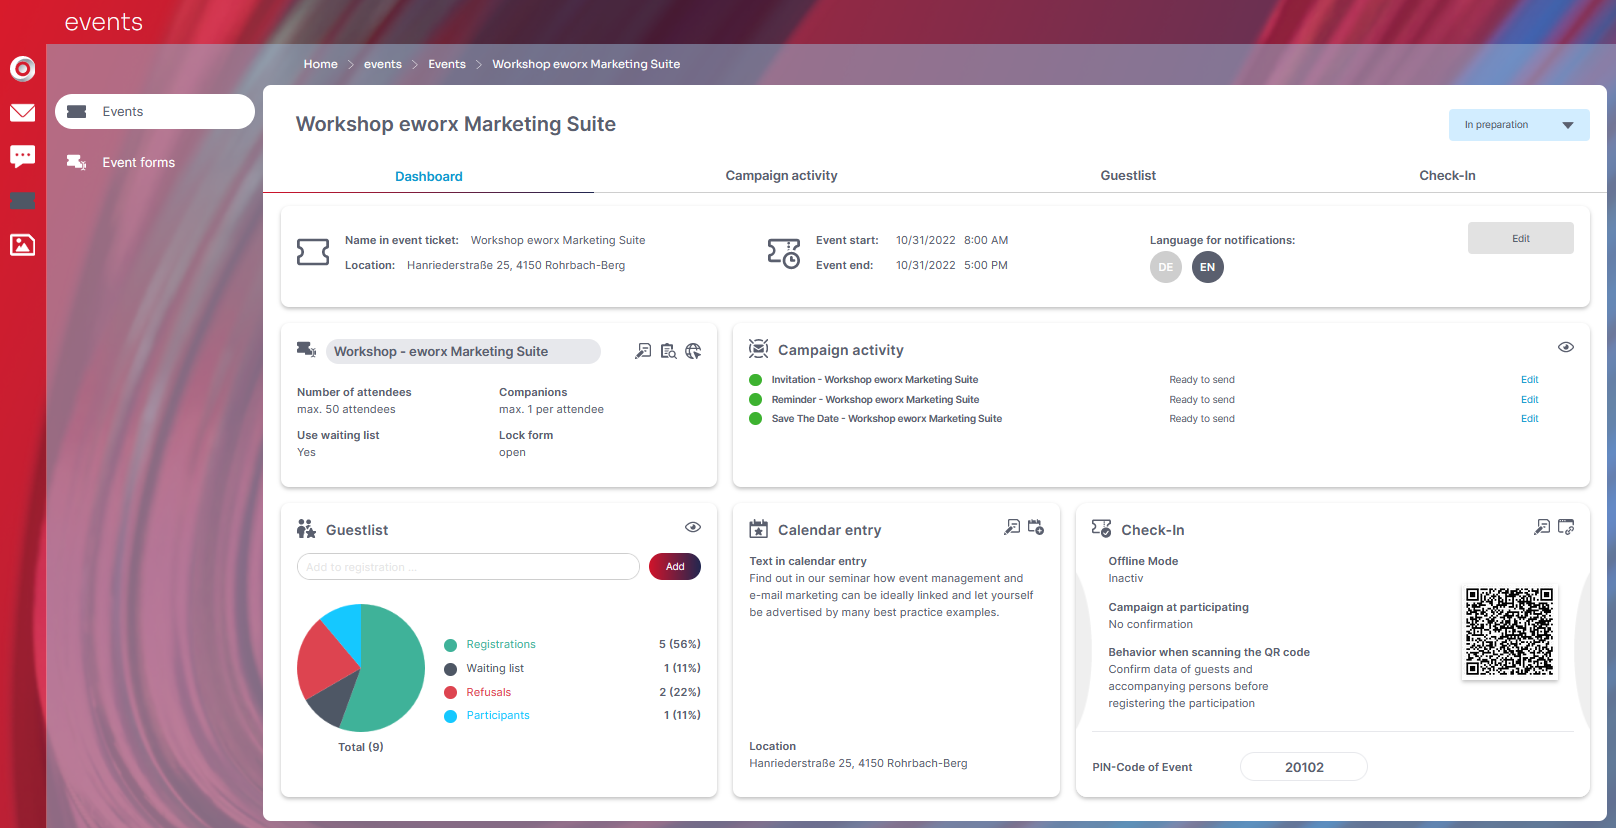
The dashboard shows all basic data of the event. You can also change the event status here.
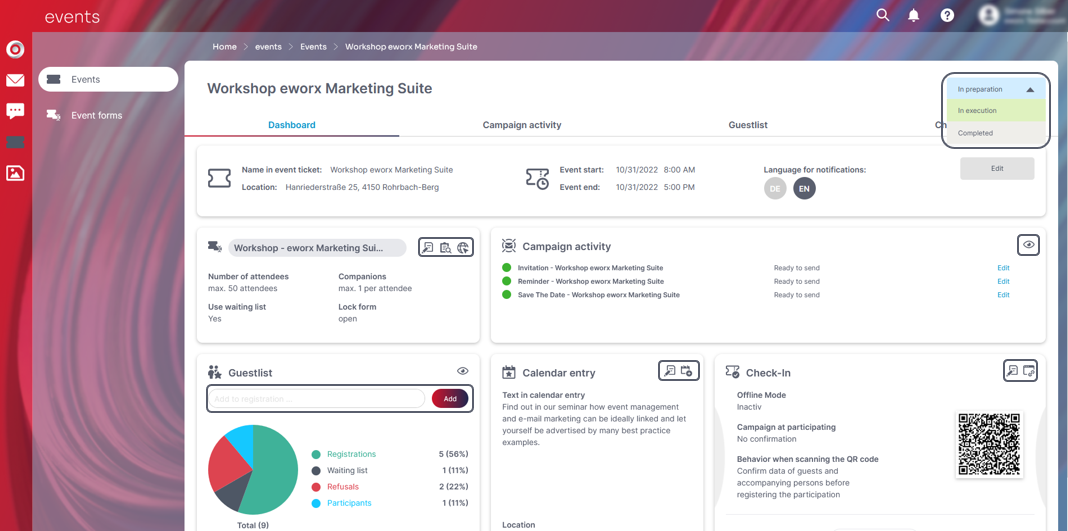
The single functions of the dashboard will be explained in the following:
On the top you can see the basic information that you made by creating your event.
By clicking the “Edit” button the event editor opens and you can edit your events’ data.
If you created your event from scratch – without the assistant – you can now choose on the dashboard whether you want to use an existing form or create a new one.
If you choose to use an existing form a drop down menu opens that shows existing active forms. Clicking the “Save” button will lead to the form editor.

If you want to create a new form a text field appears in which you can fill in the name of your event form. Clicking the “Save” button will lead to the form editor where you can create a new form as you know it.

If you created an event with the assistant or out of an existing one you already created a form within the creation process. You now see the following window:
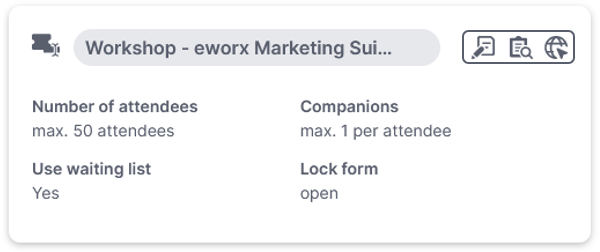
- The dashboard shows all information about your event form
- With clicking “X” you can remove the form from your event
- By clicking the “Edit” icon the form editor opens, clocking the “preview” icon will show the preview of your form
The tab campaign activity shows all campaign activities that have been created.
Clicking the headline or the eye symbol opens the campaign activity so that you can edit it.

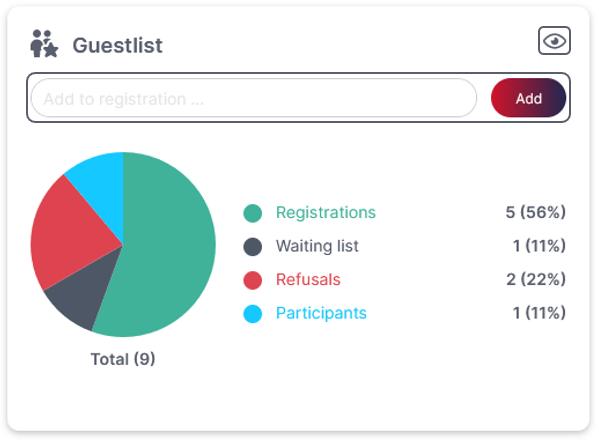
The tab guestlist shows all information to subscriptions and the guests of your event in a diagram.
Clicking the headline or the eye symbol will open the respective tab again so that you can edit your guestlist.
The field “Add to registration” gives you the opportunity to search for a subscriber within your subscriber base which can then be added to the guestlist.
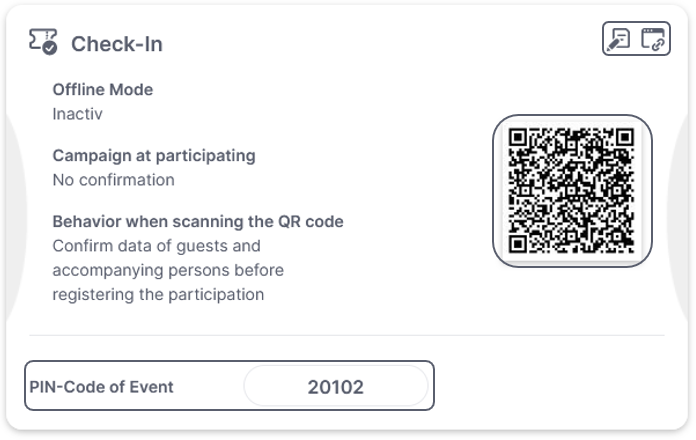
The check-in tab summarizes all event information.
Here you can also see the QR-code as well as the PIN code to your event – these information are necessary for your event in order to check-in your guests.
Clicking the headline or the edit button will open the check-in tab where you can edit your settings.
Clicking the eye symbol will open the event app.
Calendar entry
This tab also summarizes all information about your event.
Clicking “Edit” will open the screen where you can edit your event.
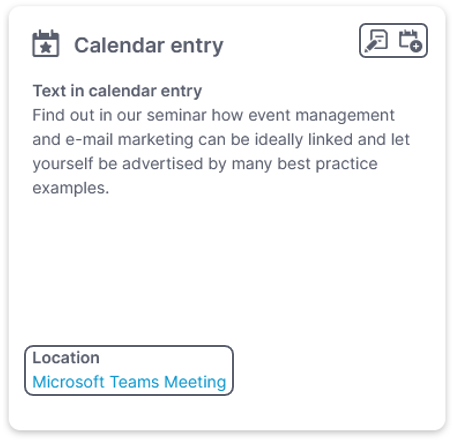
Special feature: In case you created an online event you can add a link to the field “location” that will open the respective tool by click (supported webmeeting tools are MS Teams, Zoom, Webex, Google Meet as well as Skype).
Clicking the download icon will create an iCal file with the event data so that you can add the date to your calendar.
