Email marketing automation with the workflow editor
What is email marketing automation and what’s the benefit of automation at all? You might have asked these questions to yourself, when you have heard about this term. In this whitepaper, we would like to answer as many questions as possible about marketing automation and the workflow editor
What is email marketing automation?
Email marketing automation is an intelligent and automated dialogue with leads or customers, supported by modern technologies and software. Marketing automation is not intended to replace the human one-to-one communication, but to support it.
Companies that want to grow are faced with the challenge of managing more and more customers with fewer resources. Additionally, customers are more demanding, require more information and expect first-class service. Marketing automation is not limited to marketing activities, but it is ideal for simplifying the sales process and putting customer support on a professional level.
The automation of email marketing starts with simple auto-responders or trigger mails and goes up to multi-level campaigns, which consider the individual behavior of your subscribers.
The „big ones“ have been around for a long time – now it’s the time for small and medium-sized businesses to discover the advantages of automation. Email marketing automation is not just reserved for the e-commerce sector.
With the eworx Marketing Suite workflow editor, marketing automation is affordable and easy to use for companies of all sizes and industries.
Why is there an increasing number of companies who use marketing automation?
Today, marketing is even more complex than it was a few years ago. Email Marketing, Content Marketing, Lead Generation, Conversion Optimization, Customer Relations, Analyzing and Optimizing. The list of tasks does not seem to end for a marketing manager.
Marketing automation tools are needed to ensure that marketing measures do not become a bottomless pit. They support you to manage the customer communication in the various departments – from marketing to sales to the helpdesk. There are many good reasons why successful companies are now focusing on marketing automation.
- Reduce complexity – optimize processes
Modern communication considers the different needs of the customers. Marketing automation creates the optimal balance between individual communication and consistent processes, which are easy to understand for everyone. The good traceability of communication processes and customer reactions is the most important condition for optimizing the communication, increasing customer satisfaction and revenue. - 24/7 support for your customers
It is not necessary that your employers have to be ready for a call every day and night. 24/7 support can be automated in a certain way. With triggered query responses. you can satisfy your customers with a quick answer to their concerns. - Encourage loyalty and interaction
The offerings on the market are more transparent than ever. Accordingly, the readiness to switch to other providers is increasing. However, how do you gain the loyalty of the customers and tie them closer to your company? Use your communication to influence the perception of your company positively and to remain in the mind of your customers. An active interaction with the customer is a clear sign of loyalty. Even if a customer does not react to your mailings or offers, you have to stay on the ball. Marketing automation helps you to stay in touch with your customers. Automated campaigns do the right thing in the right moment.
How does the eworx Marketing Suite workflow editor work?
There are different elements to work with in the workflow editor: In addition to triggers that automatically start your workflow, there are filter elements you can use for certain conditions and connecting those to further actions.

You can find the workflow editor under the menu item Automation.
Add a new workflow, give it a meaningful name and click „Add and edit“. The editing area „Automation“ appears.
Click on the button with the plus and select a trigger to start your workflow.
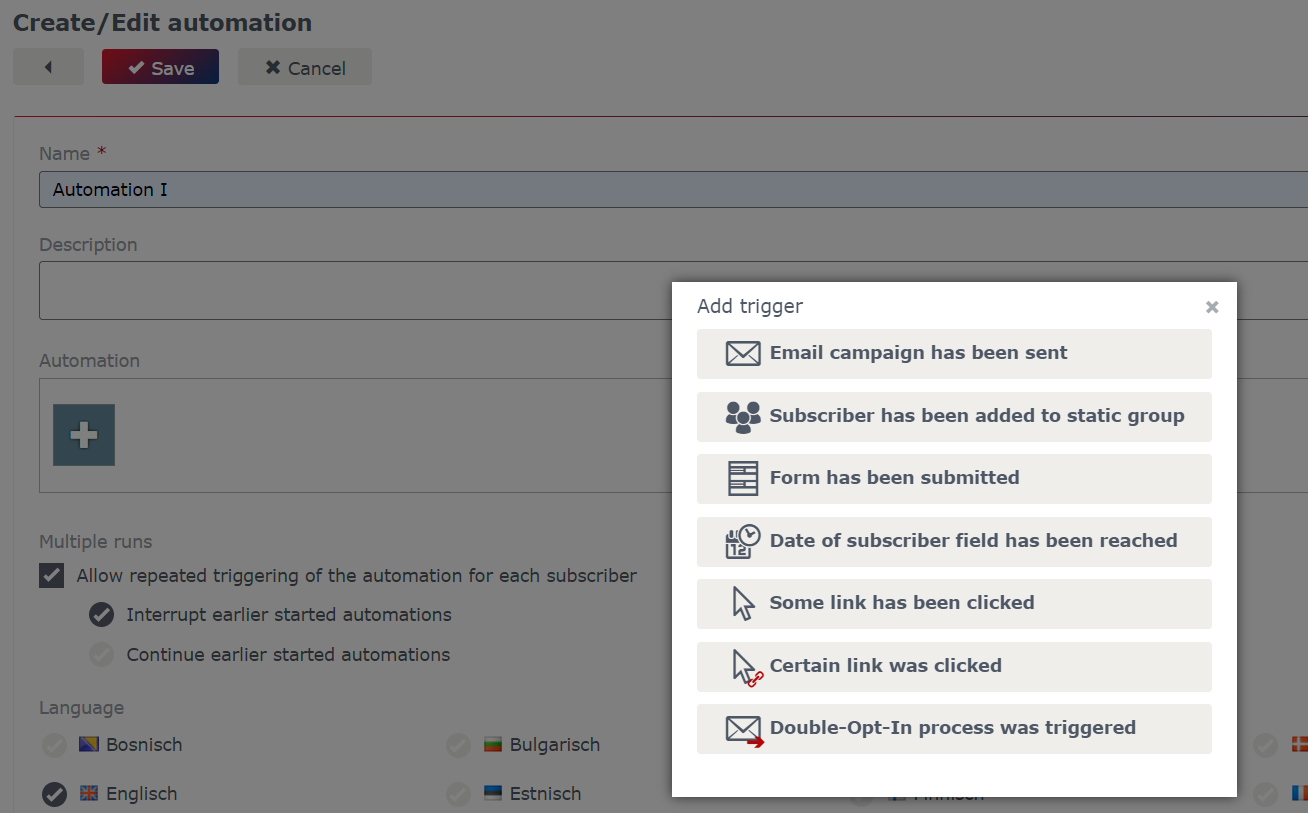
As soon as you have chosen a trigger, the element is integrated in the editing area. If you move your mouse over the element, a toolbar will appear and you have the possibility to
- call up the settings of the element,
- delete it or
- add another element.

You can switch the elements of the workflow editor via drag & drop.
Which marketing automation triggers are available and how can I use them?
Triggers are the starting point of the workflow. There are different ways in which an automated process can be triggered. Keep the different triggers in mind when you define your individual processes. Currently you have the possibility to add the following triggers to the mailworx workflow editor:
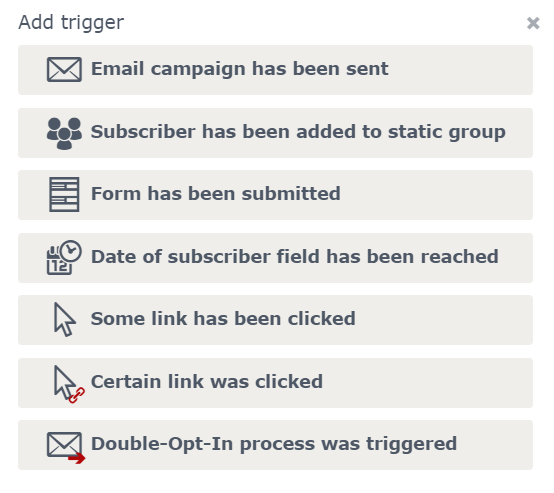
Email campaign has been sent
The workflow starts as soon as the selected campaign has been sent. It can be a regular or an event-based campaign. Make sure that the automation is already online before the campaign is sent. Only in this case the workflow will be executed as desired.
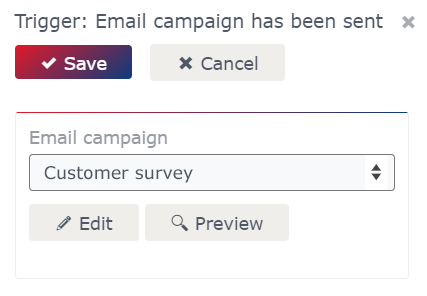
Example
With a simple workflow starting with this trigger, you can increase the participation in surveys by reminding your subscribers who have not responded after a few days. It is also possible to thank those subscribers who have participated on time with a nice email.
Form has been submitted
This trigger is the most common one. No matter what form you provide on your website or other platform, your subscribers will be happy to receive a confirmation that their request has arrived. Take the chance and expand your communication with your customers to bring your service on the next level.
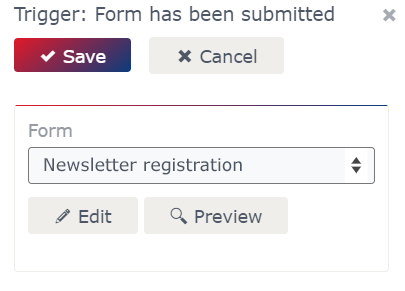
Example
A classic application for this trigger is the newsletter registration including the double-opt-in procedure and a welcome mailing. Once the form is submitted, the workflow will be triggered and the registration process is executed. A confirmation mailing with a short welcoming will be carried out to your subscribers automatically.
Date of subscriber field has been reached
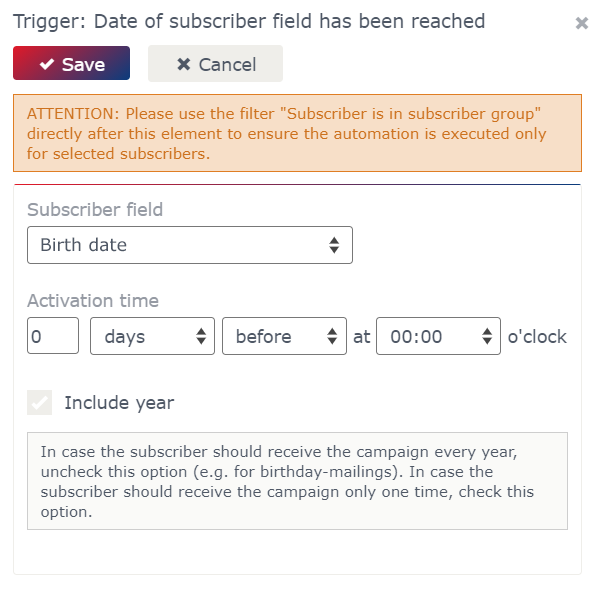
The condition for this trigger is that there is a corresponding subscriber field with the type „Date“ which contains data. Basically, the workflow starts as soon as the date in this field is reached. The function „Activation time“ allows you to trigger the workflow days before or after the date in the subscriber field. You can also define the time at which the workflow should be triggered.
Example
Consider sending birthday mailings. With the eworx Marketing Suite workflow editor, it is very easy to provide your subscribers with a coupon a few days before their birthday, to congratulate them on the day of their birthday and to remind them to redeem the coupon a few days after the date.
Some link has been clicked
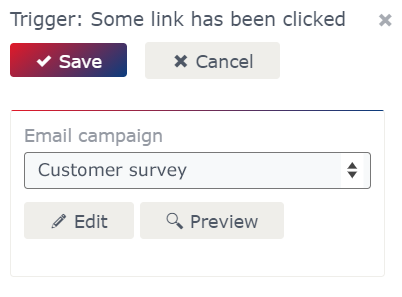
This trigger executes the workflow for all subscribers who have clicked at least on one link in the selected campaign – right after the link click. Mind that this trigger also includes static links such as the data modification form or the unsubscribe button in your mailing.
Example
You want to provide all link-clickers with a follow-up email? Then this trigger is perfect for you. This becomes relevant, for example, for targeted mailings with only one content-related topic. If static links should be excluded, use the next trigger „Certain link was clicked“.
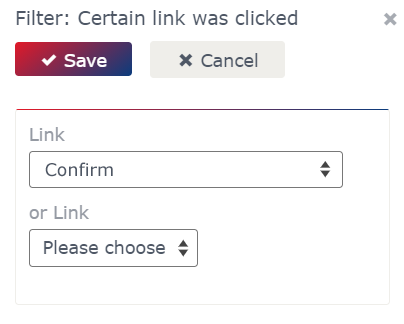
Certain link was clicked
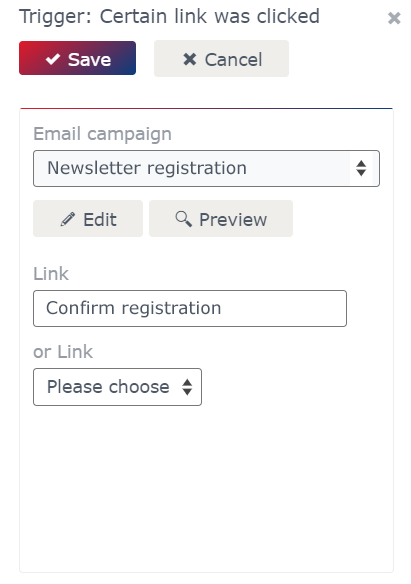
The trigger „Certain link was clicked“ is used more frequently. This allows you to define exactly which action should be performed after which link click. The function „or Link“ can also be used to combine individual links – for example from the same section in your newsletter. So you only need one workflow for the same content links.
Example
In this case, you can think about subscribing for a follow-up campaign on a certain topic. For example, you take up a specific topic in your newsletter and you would like to send additional information to anyone who is interested. Summarize image, text and button link in this trigger and provide your subscribers with relevant information via link click.
Double-Opt-In process has been triggered
mailworx also offers you, next to the Standard Double-Opt-In Process, the tools for creating your individual process. The trigger „Double-Opt-In process was triggered“ is the first element in your process and initiates further actions.
Basically, there are several opportunities how to trigger the Double-Opt-In process. The affected subscribers land in the workflow with that trigger and the respective process will be completed, no matter where in the eworx Marketing Suite you use the function „Trigger Double-Opt-In process“.
Note:
When creating an individual Double-Opt-In process, there are several things to watch out for.
Important note:
Ensure that you have tested and activated your workflow before sending the triggering campaigns or using the appropriate form. Mind that the workflow doesn’t work retroactively, but only through the activation.
Which actions are available and how do I use them correctly?
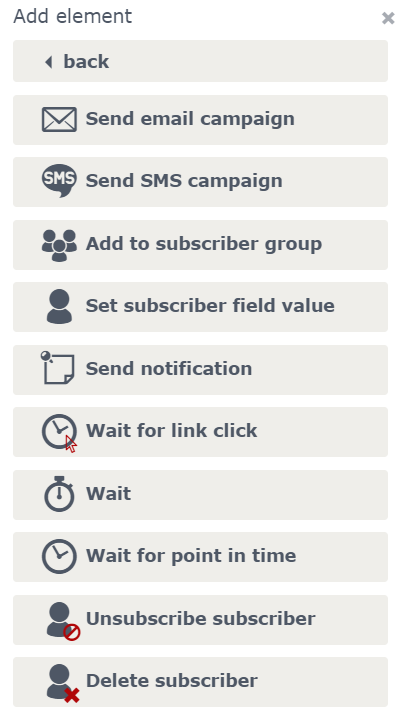
Every workflow has a certain goal. For example, you want to provide your prospects with more information, segment subscribers or send someone a notification – that’s where you can work with the available actions. Currently you have the possibility to add the following actions in the eworx Marketing Suite workflow editor.
General actions
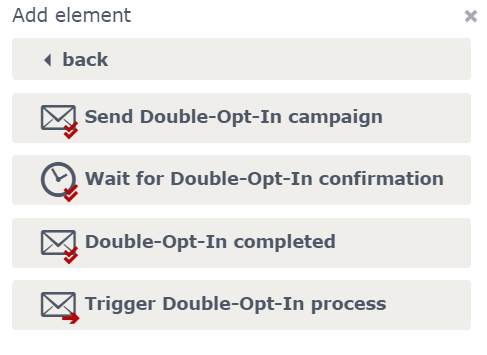
Double-Opt-In actions
Send email campaign
„Send email campaign“ is one of the most common action within workflows. It is important that the campaign is created before you can use it in the workflow editor and change the state to „ready to send“. Relevant sending options, like activating the iRated® Technology or considering the ECG list can be determined there.
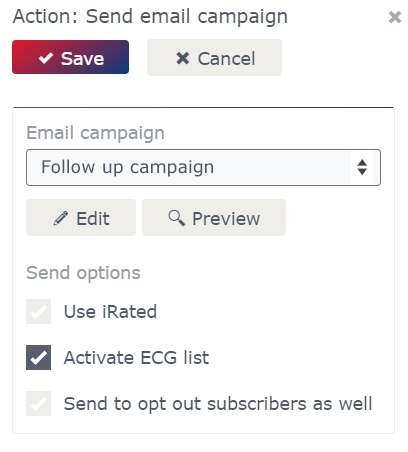
Additional functions for the action „Send email campaign“:
- Use iRated®
iRated® sorts the sections of your campaign according to the interests of individual subscribers. Use the function if the order of the sections is not given and it is also possible randomly – individual to every subscriber. - Activate ECG list
Members of the Austrian Robinson list are automatically excluded from the delivery. - Send to opt out subscribers as well
You should not activate this checkbox as a rule, because you should definitely respect the wish to unsubscribe from your newsletters. An exception is the registration of newsletter subscribers using the double-opt-in process. Subscribers are opt out until they verify their email address via a link click in the confirmation mail.
Example
Let’s take the newsletter registration on your website as an example. As a trigger, you can choose the respective form for the subscription. Directly after submitting this form, it is possible to send the double-opt-in mailing including the confirmation link of the registration. Of course, you can define additional actions or filters for this process, for example to send a reminder to non-clickers.
Send SMS campaign
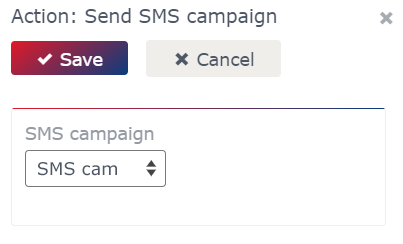
This action is very similar to sending an email campaign. Select a previously prepared SMS campaign from the drop-down-menu to send it as a part of your automation. Also pay attention to the status „ready to send“ in order to see it in the drop-down-menu of the mailworx workflow editor.
Example
A birthday congratulation via email is not enough for you? If you have the phone numbers of your subscribers, you can also satisfy with an SMS birthday campaign and differentiate yourself from others through your service.
Add to subscriber group
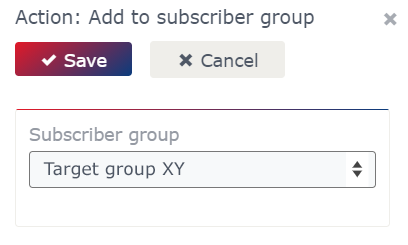
This is a versatile action. Use the function either directly after the trigger – for example, to segment your subscribers – or in combination with a filter – to implement follow-up campaigns.
Example
For example, you offer the possibility to sign up for a webinar on your website – once the form has been filled in, your participants will automatically receive a registration confirmation and will be taken to a static subscriber group. You know exactly who is attending and can use the subscriber group to send more information. Subscribers who don’t participate can also be identified easily and you can send them a reminder to your webinar.
Set subscriber field value
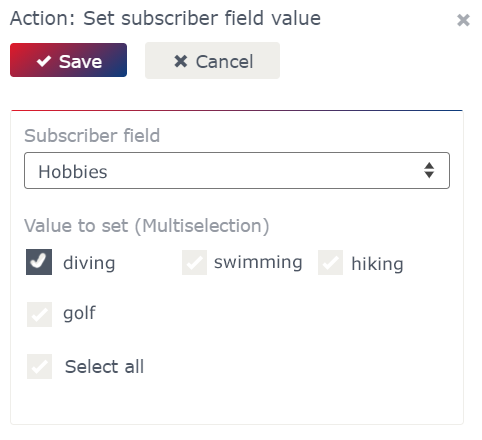
Track the responses, likes and interests of your subscribers in the subscriber database – all possible through this action. The subscriber field is set according to your settings and can be used for further measures.
Example
Use this action to segment your subscribers. Does your receiver show a certain interest in a particular topic via link click? Set the value of the appropriate subscriber field according to this response and send him more information on this topic.
Send notification
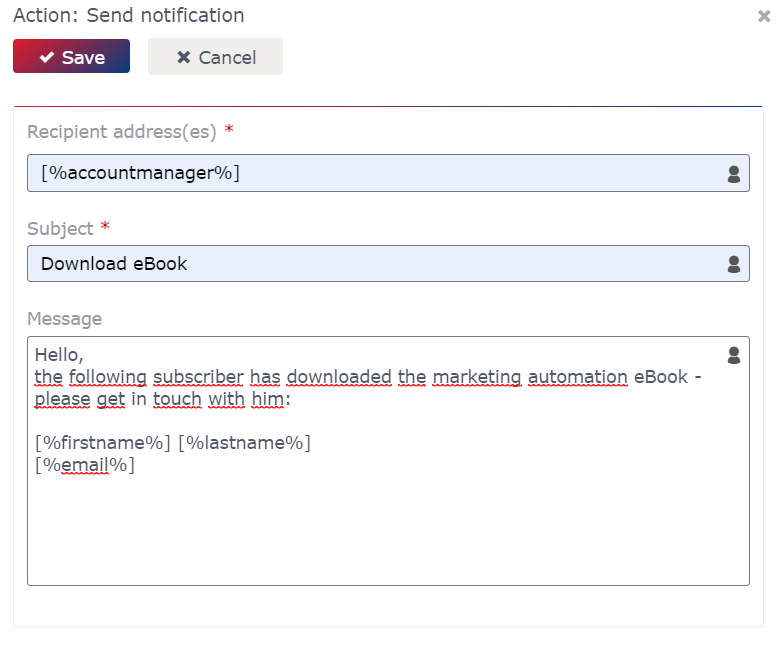
This action allows you to send a notification at any point of your workflow. Just enter the email address, the subject and the message. You can also work with personalization elements. For example, inform the subscribers account manager if he has reached a specific point within the workflow.
Example
Your customer has requested a whitepaper on your website via eworx Marketing Suite form? Send the required information to your prospect and at the same time inform the respective account manager, that the customer has shown interest for a specific topic and that he may get in touch with him about this.
Wait for link click
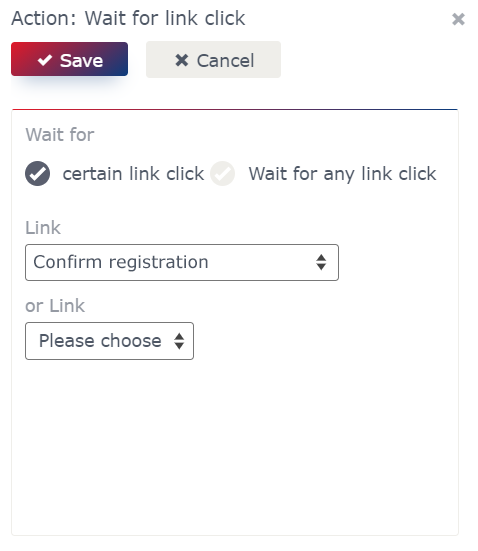
With this action, you can wait for a specific link click to respond accordingly. Here you have the possibility to focus on a certain link or wait for any link click of the chosen campaign.
Example
This element is perfect for your double-opt-in process. For example, wait for the user to click on your confirmation link in the chosen campaign. Once he has done that, he will get an appealing welcome mailing. Similarly, it also works when subscribing to a series of information. As soon as the recipient clicks on the corresponding subscriber link, you can provide him with the first part of it.
Wait
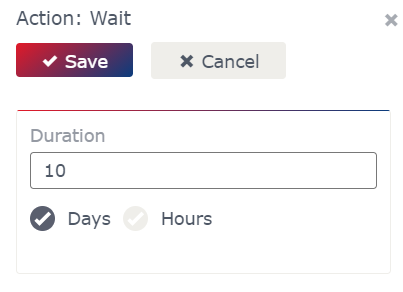
The wait element is one of the most important actions in your automated campaigns. In order to give your subscribers the opportunity to respond on your actions, you have to wait a certain amount of time before you take the next step of your workflow.
Example
You know from your personal experience that it can take a while after sending a newsletter, until the majority of your openings are taking place. As a rule, it is two days for a newsletter. If you do not use a wait element in this situation, you are too hasty to take the next step, because nobody had the opportunity to open the campaign.
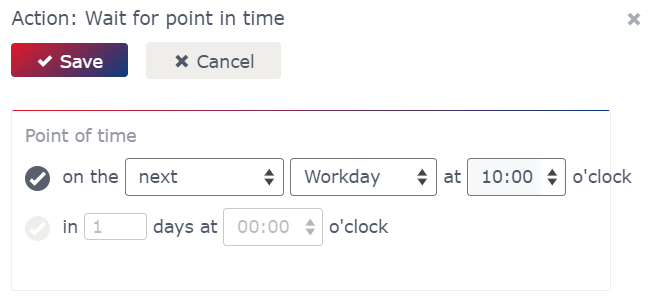
Wait for point in time
In addition to the duration, it is also possible to determine a certain point in time. You would like to wait with your measures for the next working day or a specific day of the week? This action makes it possible. In addition, you can use this element to define a specific daytime when you want to start your next action.
Example
For example, you can use this action to wait for the next working day. In the case you offer a free trial for a business software, it makes sense to remind your test users on the next working day instead of the weekend because it is more likely that your email will be noticed in the recipient’s inbox.
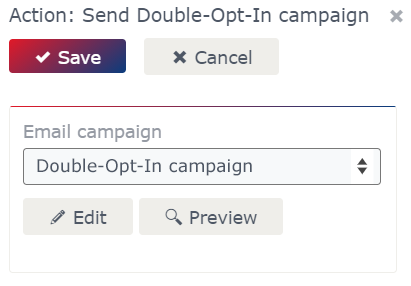
Send Double-Opt-In campaign
mailworx also offers you, next to the standard Double-Opt-In process, the tools for creating your individual process. For example, you are able to create your own Double-Opt-In campaign in order to confirm your subscriber’s consent and integrate this action in your workflow.
Only those campaigns that show the characteristics of a Double-Opt-In campaign are listed in this element. You have to mark the email campaign as „ready to send“ as well as event-dependent and insert a link with the link type „Double-Opt-In confirmation“.
Note
When creating an individual Double-Opt-In process there are several things to watch out for.
Wait for Double-Opt-In confirmation
The goal of the Double-Opt-In process is to get the consent of your future subscriber. With this action you wait for this consent via clicking the link with the link type „Double-Opt-In confirmation“ in the priority email campaign.
Note
When creatinig an individual Double-Opt-In process there are several things to watch out for.
Double-Opt-In completed
As soon as your subscriber clicked the confirmation link, the Double-Opt-In process is completed and the respective status „Double-Opt-In confirmed“ is set for that subscriber. Date, time as well as the respective campaign are also documented and serve as evidence for the consent.

Note
When creating your individual Double-Opt-In process in the eworx Marketing Suite there are several things to watch out for.
Unsubscribe subscriber
You also have the opportunity to unsubscribe a subscriber with your individual workflow. The action „Unsubscribe subscriber“ goes along with the respective behavior of unsubscribing which you have defined in your System Settings. The respective action has an impact on that element in your workflow, depending on your decision for the classic unsubscription or a GDPR-compliant unsubscription.
Example
Use this action for example within your Double-Opt-In process. Subscribers that do not confirm the confirmation link within your process can be unsubscribed from your mailings directly via this element.
mailworx also offers you a standard process for that.
Delete subscriber
Next to unsubscribing your subscribers, you also have the option to delete recipients directly out of your database. This element is also suitable for legal conform applications within the GDPR. After using this action, you are not able to insert further actions or filters because the respective subscriber has been deleted completely.
Example
By using the action „Delete subscriber“ you can define individual deleting processes for example. If you don’t have a legal conform consent of your subscriber, you can define a process to delete the respective persons automatically.
How can I integrate conditions in the workflow editor and which filter options are available?
You can use filters directly after triggers or actions. It’s possible to use them for a better overview or to create a condition for the following actions. Currently you have the possibility to add the following filter options in the eworx Marketing Suite workflow editor.

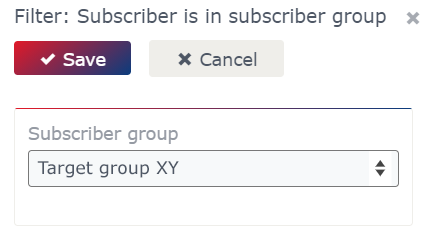
Subscriber is in subscriber group
With this filter, you can target different subscriber types. You can gain an overview of which subscribers are in the respective subscriber group and can adapt your actions based on this filter directly to the interests of your recipients – this will increase the relevance of your measurements enormously.
Example
Adjust your communication to the different types of your customers – segment, for example, between regular or new customers. Therefore, you can run a competition and you will get a quick overview of how your participants are organized or you can adapt the communication to the current customer status.
Certain link was clicked
You do not have to throw all the clickers into one pot. Choose from the different links in your campaign, those you want to keep working on or get an overview of how many of your subscribers have clicked on this link.
Example
Again, this filter is perfect for segmenting your subscribers within the workflow. Do you offer different topics in your regular mailings? Different links receive different reactions – use this information to provide your audience with even more relevant topics.
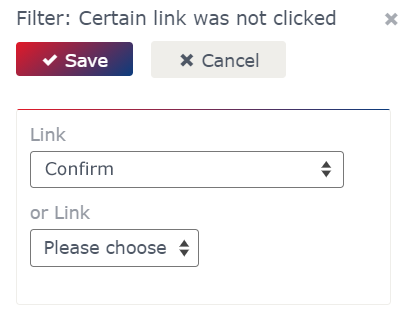
Certain link was not clicked
Of course, there is also the possibility to set a specific action based on the non-clickers. For example, wait a few days and send those a reminder of your previous mailing.
Example
This filter can be used in your double-opt-in process. You can remind those recipients who have not yet clicked on their confirmation link. A nice reminder can still turn them into new subscribers.
Statistic filter
Statistic filters always refer to the previously sent email campaign and can therefore only be used after such an action or trigger. It is also important to use these filters in combination with a wait element so that your recipients have the opportunity to respond to your email.
Example
Let’s say you are creating a series of information that sends multiple campaigns to different points of time. In this case, it is interesting to see how many subscribers open each campaign. So you can quickly determine whether the series is perhaps too long, because the interest decreases rapidly after sending the third campaign.
Double-Opt-In was not confirmed
In order to filter those subscribers who did not click the link with the link type „Double-Opt-In confirmation“, you can use this element. Like it goes with other filters, you have to combine „Double-Opt-In was not confirmed“ only in combination with a Wait-element. This is the only way to give your subscribers the chance to react to the priority email.
Note
When creating an your individual Double-Opt-In process in the eworx Marketing Suite there are several things to watch out for.
Filter for a better overview
This example shows you how to use filters not as condition before the next action, but on the same level:

Filter as the condition for the next action
The example below shows you how to use filters to set different actions depending on the behavior of the subscribers:

When is a workflow active?
If you click on the „Save“ button, nothing happens, except of saving your actual workflow process. You can modify or extend it as you wish without affecting real-time operations. As soon as you click on the button „Activate automation“, the automated workflow is online.
From the time the workflow is activated, you can see the number of subscribers who are currently running through each element. You can no longer edit the workflow, unless you disable it again. In this case, however, you should be aware that the evaluation (the number of subscriber in the workflow overview) is getting lost. Other areas remain uneffected.
What is the difference between the deactivation of a workflow and archiving it?
In the workflow editor, you have two ways to terminate an active workflow.
Deactivate automation
If you deactivate a workflow, the current execution is stopped and all existing execution data gets lost. This function is used when the automation should no longer be triggered and forwarded. A deactivated workflow can then be edited and activated again.
Example
One of your campaigns contains a wrong or obsolete information? In this case, it is useful to deactivate the workflow so this information is no longer carried out. The campaign can be updated and the automation can be set online again. However, remember that the statistical data gets lost in this case.
Archive automation
If you archive a workflow, only the trigger is deactivated, so the workflow can no longer be started. Active executions are not stopped and will pass through to the end of the respective automation. An archived workflow can no longer be edited and stores the collected execution data.
Example
Maybe you carry out a competition on your website and use the appropriate form as a trigger for your workflow. In this case, it is useful to archive the workflow after the competition has expired. Participants who submitted the form on time will pass through the workflow, but it can no longer be triggered again.
Can I view the individual run of the respective subscribers?
Yes, that is possible. The function „Show run of subscriber“ allows you to select the appropriate subscriber from whom you want to see the actual run. With „Show run“, you will see the corresponding process.

The green mark indicates that the subscriber has already completed this step successfully – for example, an email campaign has been sent, whereas the grey area shows that these steps have not been completed yet. The subscriber did not execute steps in red because the defined criteria do not apply to them. The blue marker shows where the subscriber is currently located.

How can I find out which subscribers have already reached the respective position in the workflow?
You can easily display the respective subscriber list of the selected position in the workflow. Therefore, move your cursor over the desired element and click on the subscriber icon.
A subscriber list will open and show you all subscribers who have already reached this step within the workflow. For additional measures, you can also save or export this list within a static subscriber group and see the respective execution time.

What are multiple runs and when should I disable them?
If the checkbox is activated, the workflow starts several times – provided that the trigger can be repeated. If your trigger is, for example, a click on a link, the multiple pass should be disabled. When it comes to campaigns that should be repeated annually (e.g. birthday mailings), it is clever to enable the start of the workflow again.

Example
- Multiple runs enabled
birthday, anniversary - Multiple runs disabled
satisfaction survey, info series
Is an import also a possible trigger for a workflow?
Yes, this is possible if the action should only perform for new imported subscribers – not for subscribers who are already in the system and will be updated by the import. Therefore, choose the trigger „Date of subscriber field has been reached“. In the drop-down-menu, you can select the subscriber field „Creation date“. This date is automatically saved by the system.
Mind that after the trigger you have to filter the same subscriber group you are using for the import. So you make sure that the workflow does not trigger all new created subscribers – only those of your import. After this filter, you can set any additional filters or actions.
Example
- Set values of subscriber fields after an import
Advantage: The import file does not have to be supplemented by additional fields.
- Send a campaign after the import
You can also send different campaigns, depending on the interests of the new subscribers.
- Assign subscribers to another subscriber group
When you use the classic import process, you can only select one static subscriber group. With the workflow editor, it is possible to choose more and with specific filters.
Note
The examples above can also be applied to subscribers who have been created via a form or manually. If you do not use a filter for the specific target group after the filter, the workflow applies to all new created subscribers, no matter how they came into the system.
Is it possible to copy a workflow?
Yes, it is possible to copy an existing workflow. Simply use the „Copy“ button, which you can find behind the three underlying dots in the line of the respective workflow. A new – not yet activated – workflow is created. You can customize it before you activate it as a new workflow.
Example
- Use this function if you need the same workflow in different languages. Once you create the workflow in a defined language, copy it and change the relevant campaigns, forms, etc.
- In the course of time, it is possible that you want to change the content of your campaigns. In this case, you can also use this function. Copy the „old“ workflow and change the corresponding campaign.