Creating newsletters as easy as it can be
Create your newsletters fast and easy with the eworx Marketing Suite. You don’t need any special prior knowledge
as the eworx Marketing Suite guides you step by step – from creating an email campaign to dispatching it.
The surface of the editor is very clear. The campaign settings and the newsletter sections hold various functions ready for you. These menues also adapt to the requirements of your newsletter template as well as your company – just like a personal assistant.
This whitepaper supports you in correctly using the editor.
Create email
campaigns
7 steps to a professional newsletter. You get to know the most important general settings and learn how to work with the campaign editor.
Overview over all campaigns
The eworx Marketing Suite guarantees a simple management of your email camapigns. Learn more about the options of the email campaign overview!
Use campaigns
as default
Reach your goals faster using default values. We show you how to create and re-use templates for future campaigns with this feature.
Create new email campaigns
In order to create a newsletter, choose the menu item ‚Campaigns‘ and then click the button ‚Create a new email campaign‘. First you have to define the most important general settings (see explanations under step 1).
After confirming this, the eworx Marketing Suite guides you in seven steps from creating to dispatching your email campaign. This steps are listed in the following.
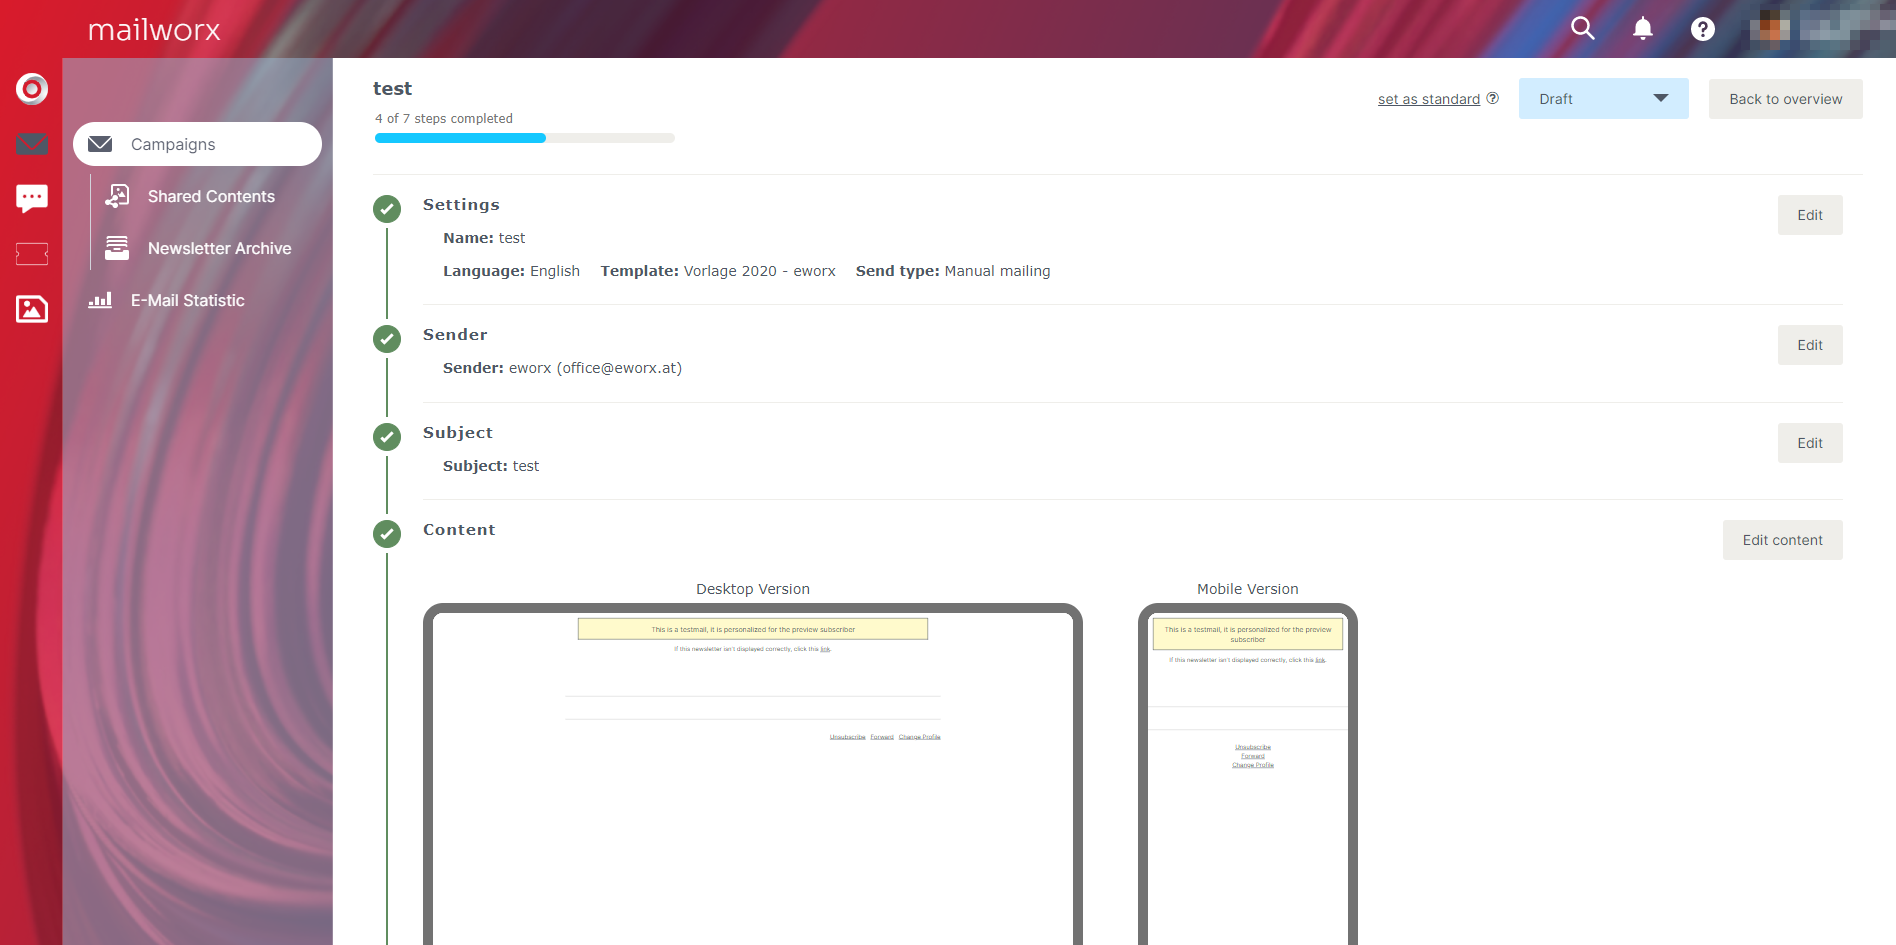
Step 1: Settings for email campaigns
Name
The name of the email campaign can only be seen in the system and will be displayed in the newsletter archive, in case you have one on your website. This internal name can not be seen in the newsletter itself. You do best by using meaningful names in order to ease the search later on.
Language
The setting of the language of your email campaign ensures that only those subscribers get your newsletter, that have set this language in their subscriber data.
Template
Template means the design or newsletter master that you want to use for your newsletter. If you are working with various templates, you can choose the respective one here.
Note: In contrast to the other settings, this one can not be changed in retrospect.
Default settings
This point affects the content of your email campaign and can be seen as original for the structure of your campaign. It is possible to save any number of campaigns as default value.
Newsletter type
You can only see this section if you are offering various newsletter types on different issues.
Select send type
Choose manual mailing if you want to either send your email campaign now or plan to send it later. You have to set event dependent mailing for those campaigns, that are sent based on a trigger (e.g. by submitting a form, clicking a link, etc.). You can also change this setting later on.

Step 2: Determine sender
Sendername & Senderaddress
Select the sendername as well as the email address of the sender, which should be shown in your recipient’s inbox. Additionally you can set the following settings:
- A/B Split Test
Experimenting can be worth it: Are your subscribers more willing to open your mails if they are sent by a well-known contact of your company? There are some scopes where this can make sense (e.g. mailings from the support or sales department). You can learn more on the topic of A/B testing in this whitepaper.Activate the A/B Split Test in order to test it and increase the success of your email campaigns! Further settings (e.g. size of the test groups, duration of the test, etc.) can be made in step 7 „Send“. - Personalization
By clicking the person icon next to the input field, you can insert personalized elements or text components from the subscriber database. For the case set above this would be for example fields that contain name or email address of the respective contact.
Select alternative Reply-To address
By activating this option, you can define an email address for response mails that differs from the senderaddress.

Step 3: Subject line and A/B Testing
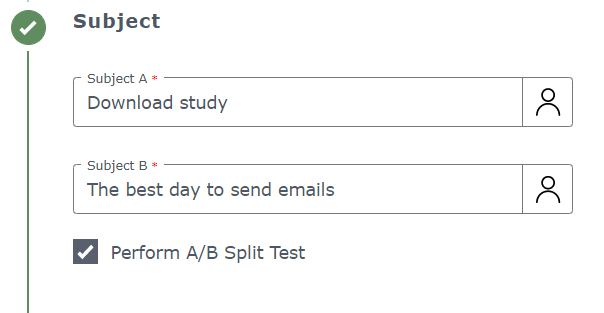
Subject
The subject line is one of the most important things in email marketing. Take a few thoughts on the wording, because this affects the opening rate of your newsletter.
- A/B Split Test
Because of the importance of the subject, we highly recommend an A/B Split Test! Here you can enter the different subject versions. All further settings (e.g. size of the test group, duration of the test) can be made in step 7 „Send“. - Personalization
Increase the probability of an opening and surprise your recipient with a tailor-made subject line. A simple opportunity to do so is using the name of the recipient in the subject line.
Step 4: Edit the content of your email campaign
By clicking the button ‚Edit content‘ the eworx Marketing Suite campaign editor will be opened. On the left side you can see the editing area (WYSIWYG). If you start with an empty campaign, all design requirements of the respective newsletter template are taken over. The areas header, introduction and footer are already there and you only have to fill them partially with images and text. In the following we are talking about further campaign settings.
Newsletter sections to structure the content
In order to add further content, you can, depending on your template, choose different section types. Each type has a different pre-defined look (e.g. single- or multi-column, background colors, text and buttons, font size, etc.) and contains placeholders for text and images.
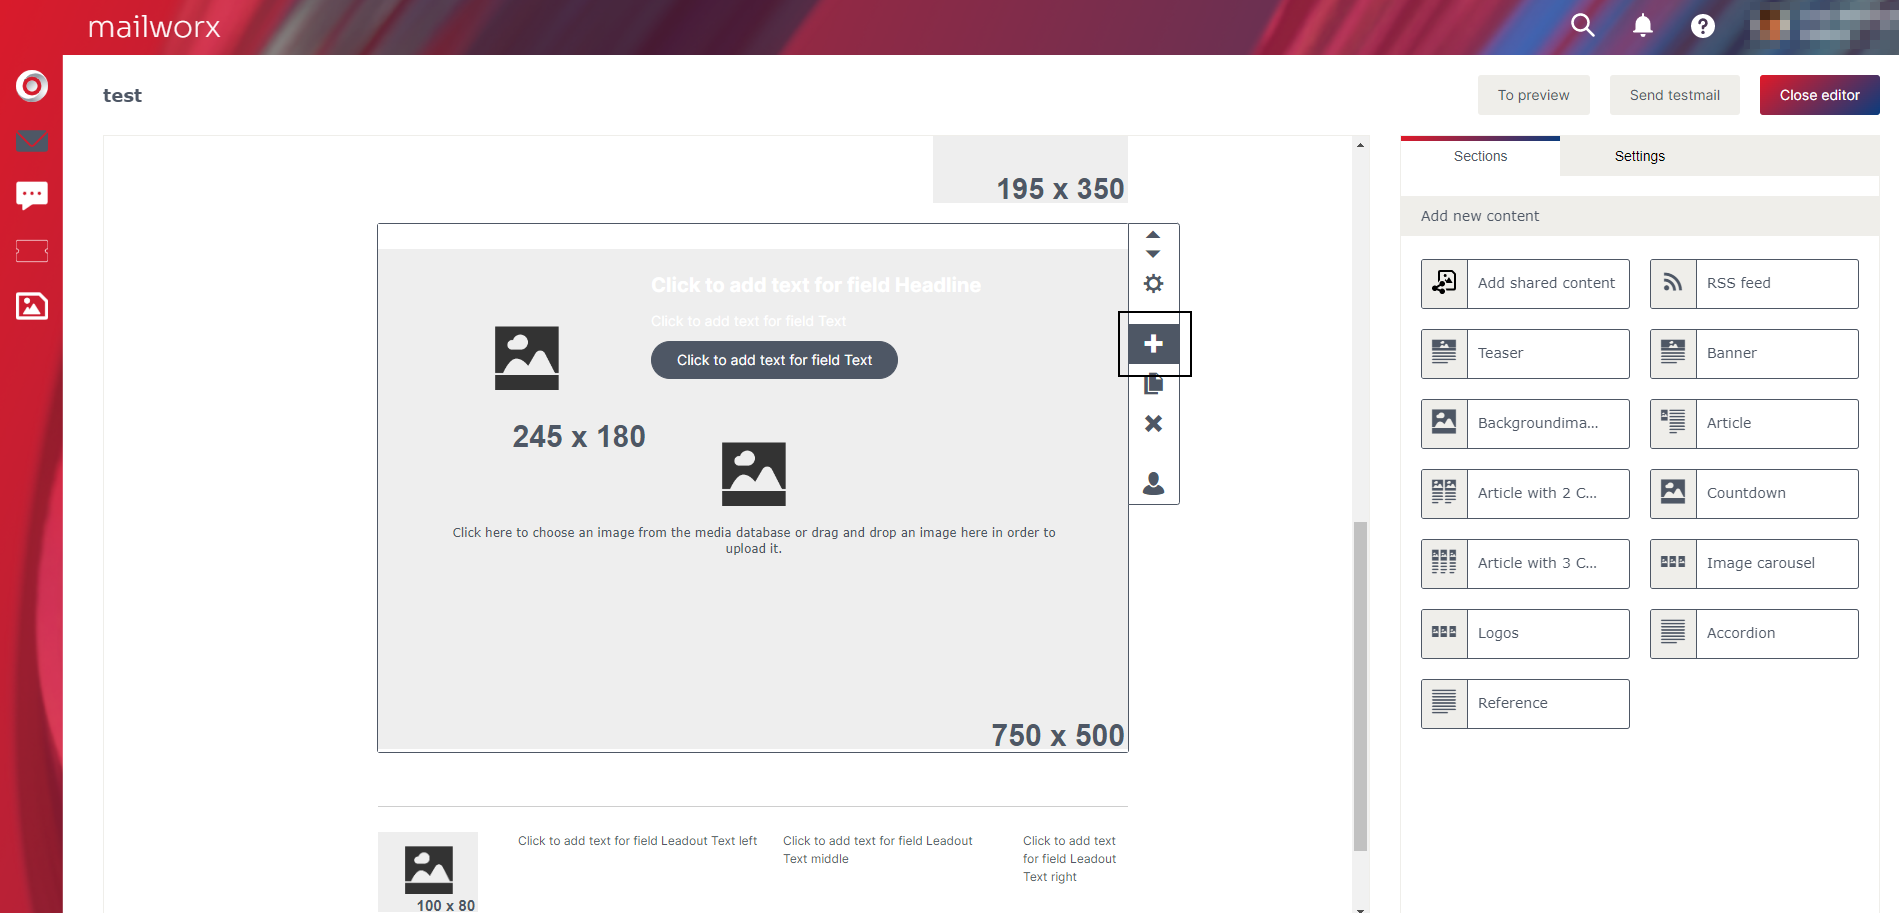
You can see the available types on the right side under ‚Sections‘ and can insert them with a click at the end of the email campaign (1 in the figure). In order to insert a new section directly underneath another one, use the ‚+‘-icon in the editing bar on the right side of the section (2 in the figure).
Working with sections and further settings
The menu bar on the right side of the section contains important commands such like ‚Add‘, ‚Move‘, ‚Copy‘ and ‚Delete‘. It is also possible to restrict the visibleness of a section for a certain target group (dynamic content).
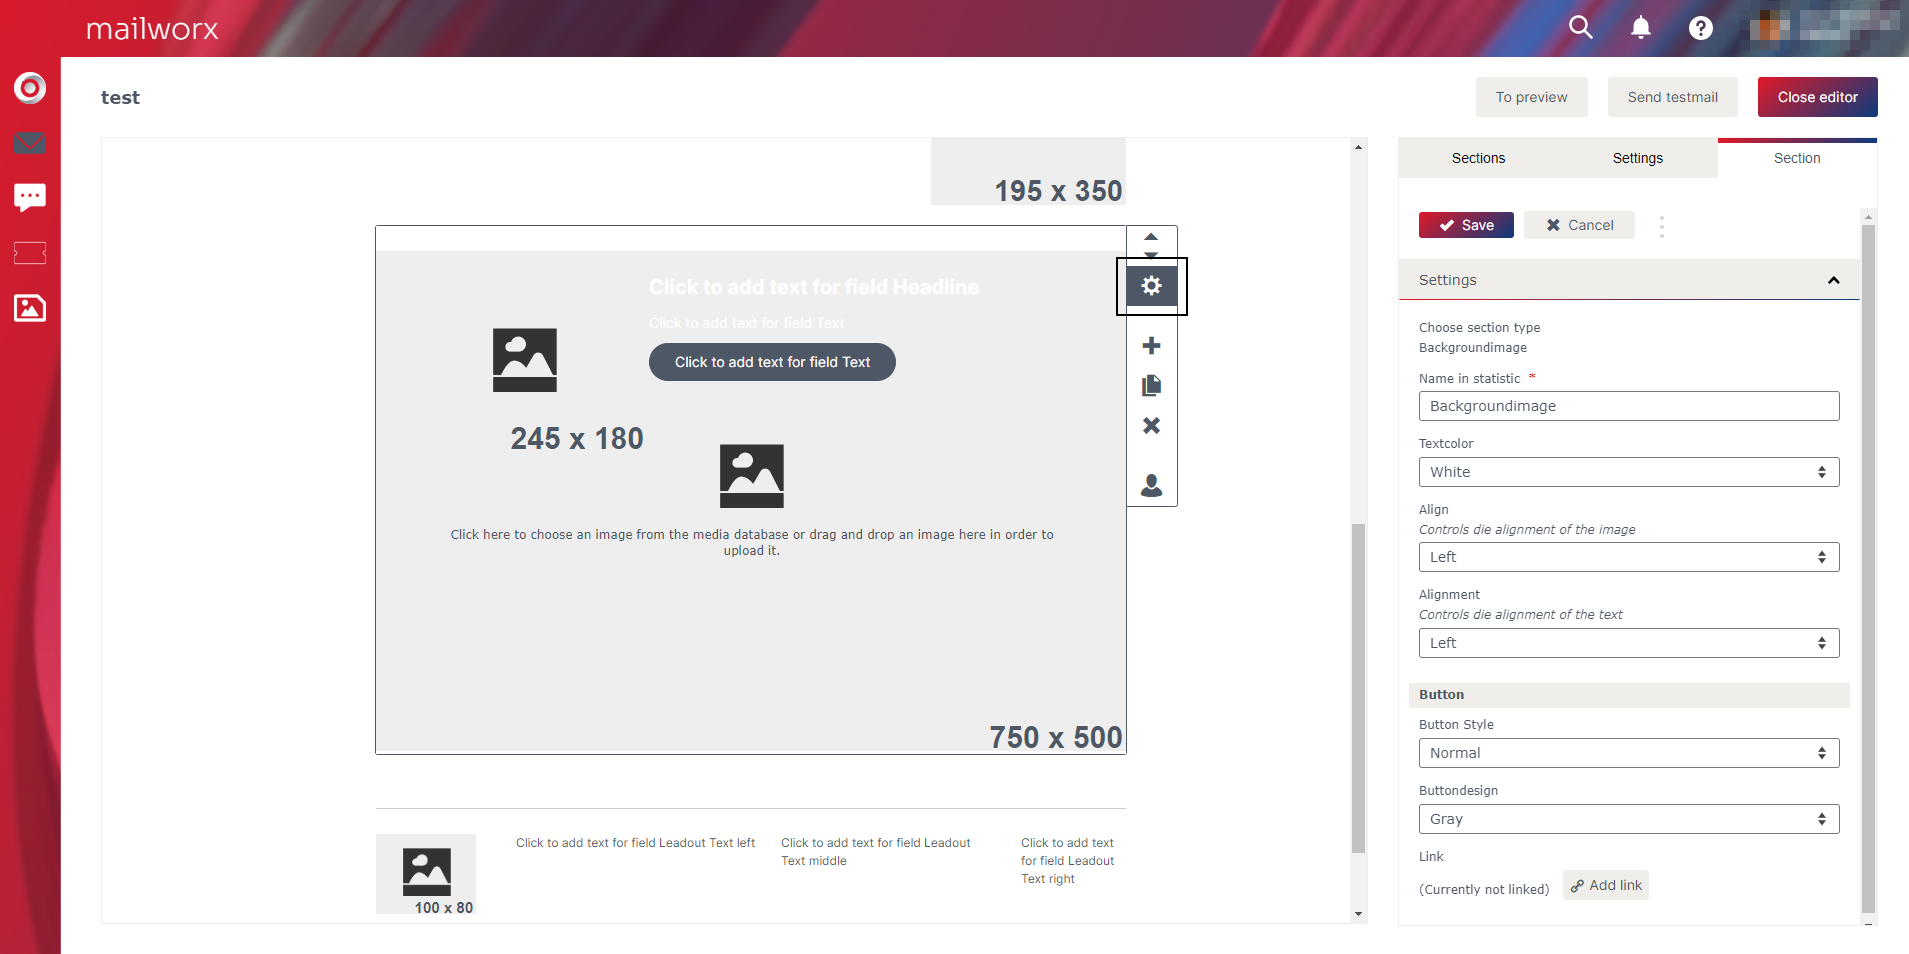
You can change the properties of a section by clicking the gears icon. These settings can vary depending on template as well as section type. Next to the input field for the name in statistics you often find the following options and input fields.
- Selection of the background color
- Selection of the button color
- Input field for button links
- Selection of the position of the image
- Visibleness in the table of contents
Insert links and button elements in newsletter
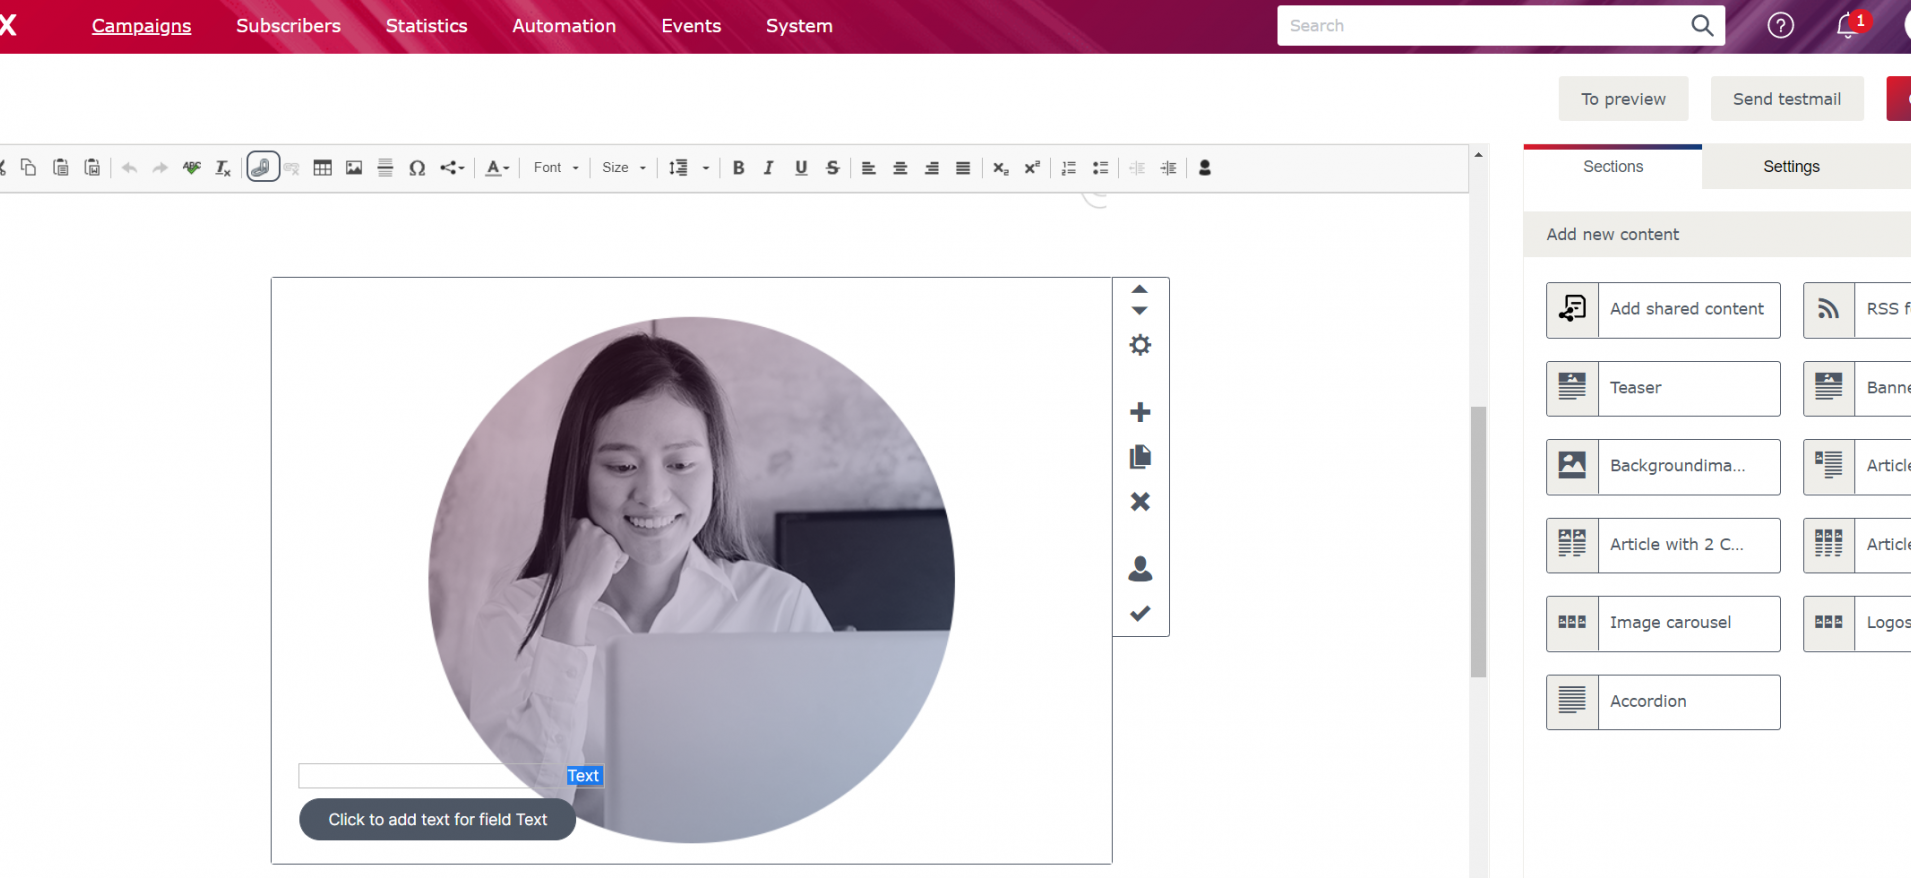
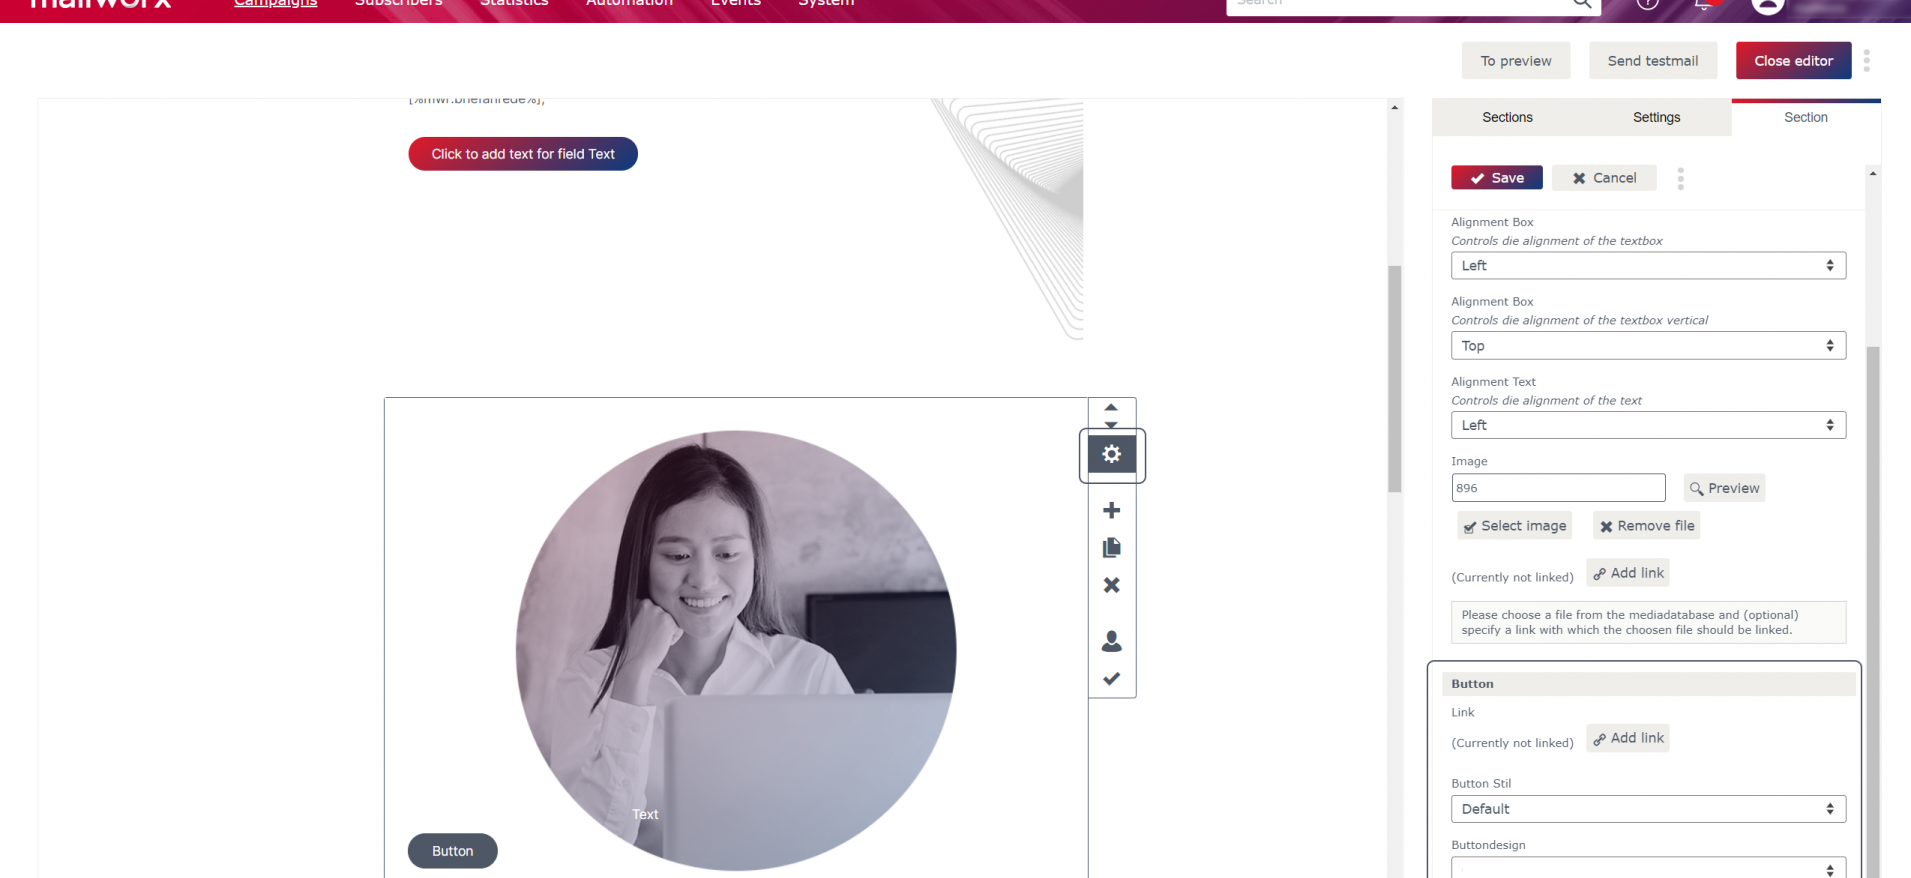
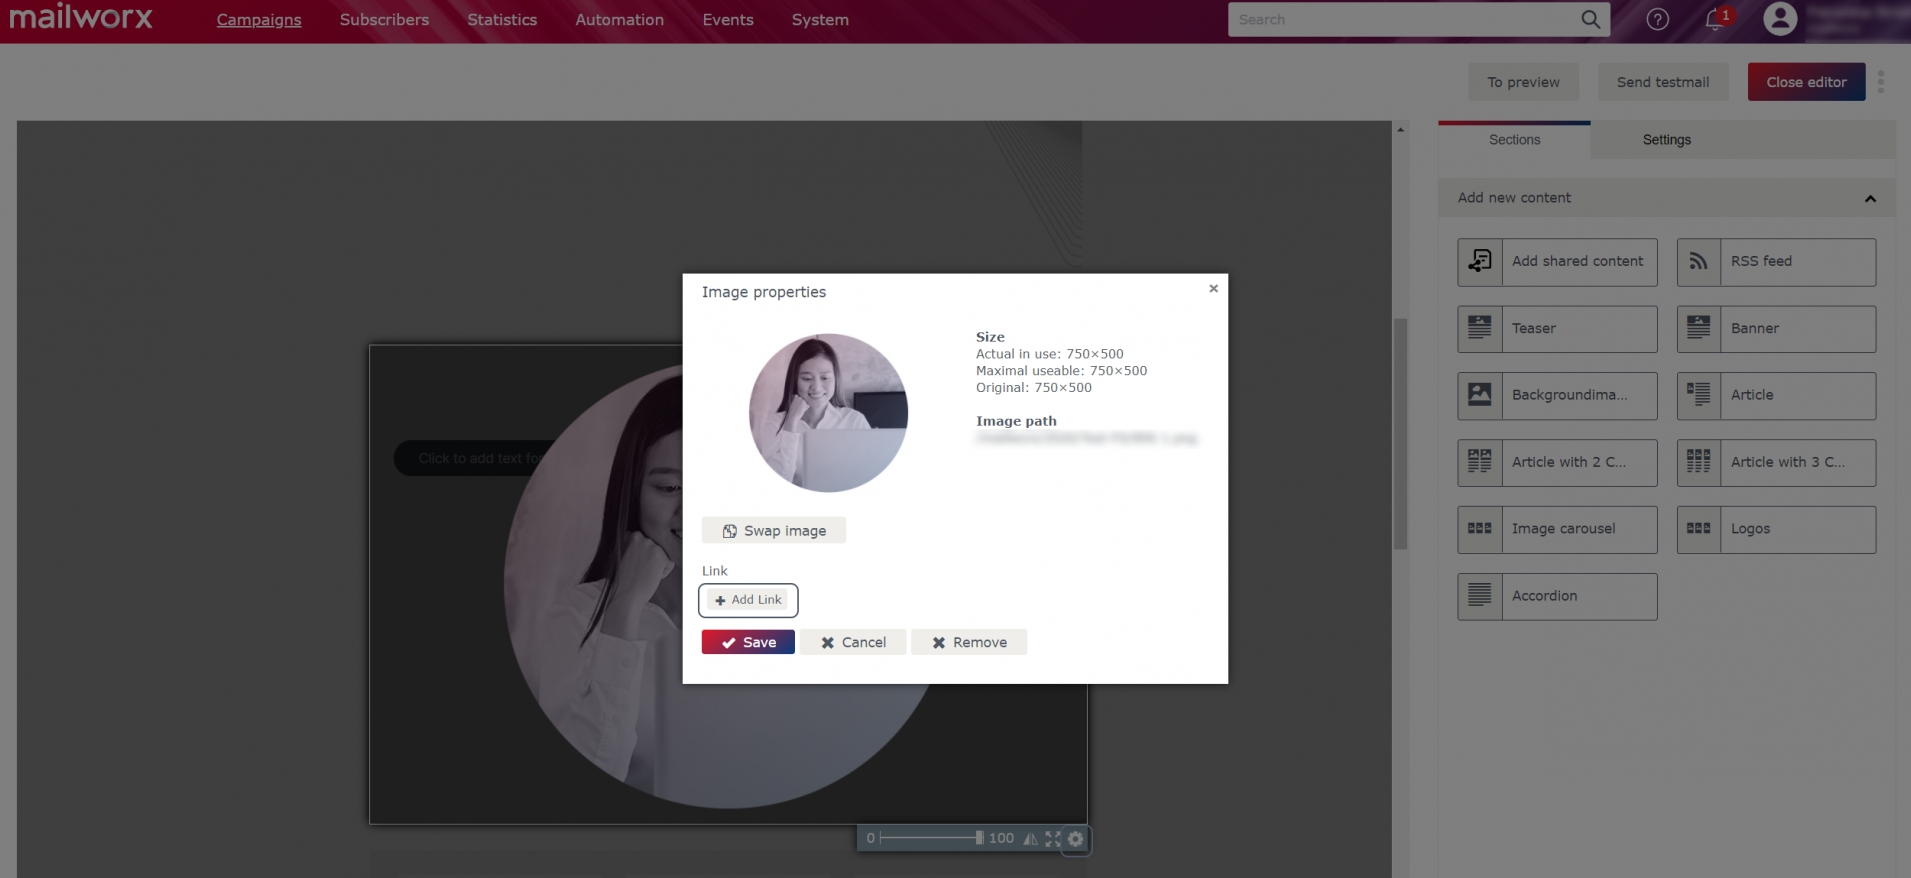
Within your newsletter you can enricht text, buttons as well as images and videos with links. In order to link a text, you simply have to select it, then click on the link symbol in the editing bar at the top (Fig. 1). The window of the link settings will open. You can deposit the links for buttons in the section settings (Fig. 2). Images can be linked directly by clicking on the gears icon (Fig. 3).
Next to the usual links on websites, there are multiple link types available in the eworx Marketing Suite. In this whitepaper we gathered all setting opportunities as well as some tips for you.
- Links to websites – http/https
- Links to ftp-servers
- Free protocol type
- Section anchor
- Email address
- Form
- Photo gallery
- Calendar entry
- Landingpage
- Media database
- Personalisation
- Buttons
Use images and videos in the newsletter
Insert images
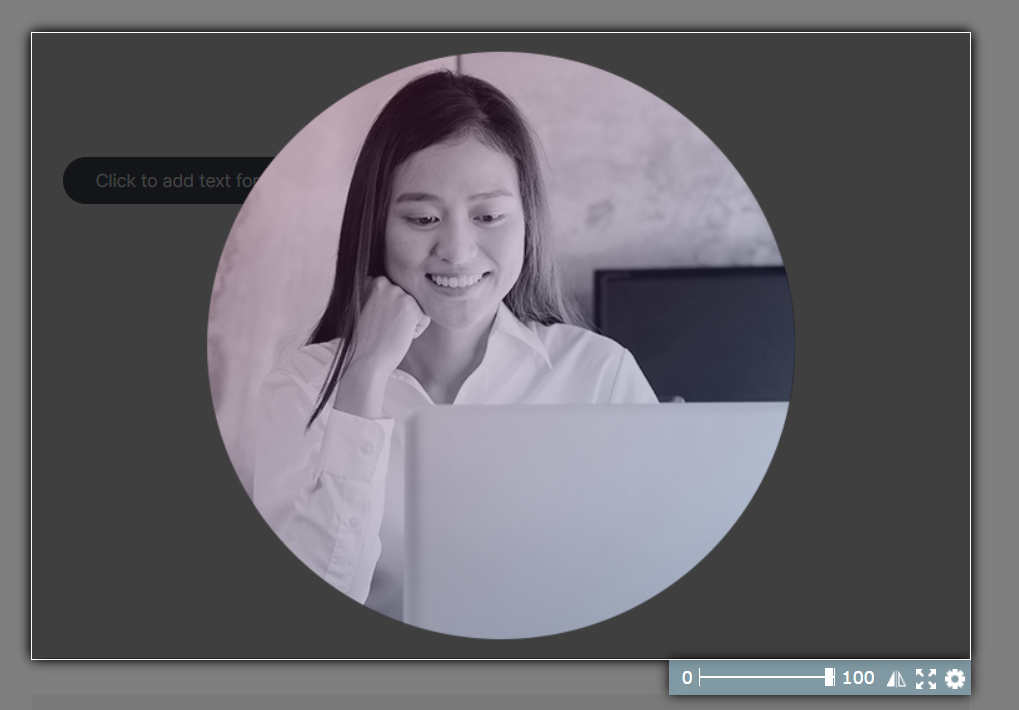
Of course you have the opportunity to upgrade your newsletters optically with images. You can either drag the images into the grey placeholders via drag & drop or you choose existing pictures from the media database. Afterwards you can adjust the picture, adapt the size or link it. You can even find the settings for high-resolution images here.
Insert videos
Directly embedding videos in email campaigns unfortunately comes out as wishful thinking. Many email programs refuse playing videos or require the download of the video before playing it. Especially for mobile devices this is not a practical solution. The video element of the eworx Markteing Suite manages both, enthusing recipients with videos as well as an optimal solution regarding the openings in different email clients.
Integration is easy. Insert the URL of the respective video and choose, which play button you want. The preview picture in your campaign is generated automatically with the thumbnail in the video and your further settings. In the next step you have to set whether you want the video to be played in the web version of your newsletter campaign or directly on the video platform.
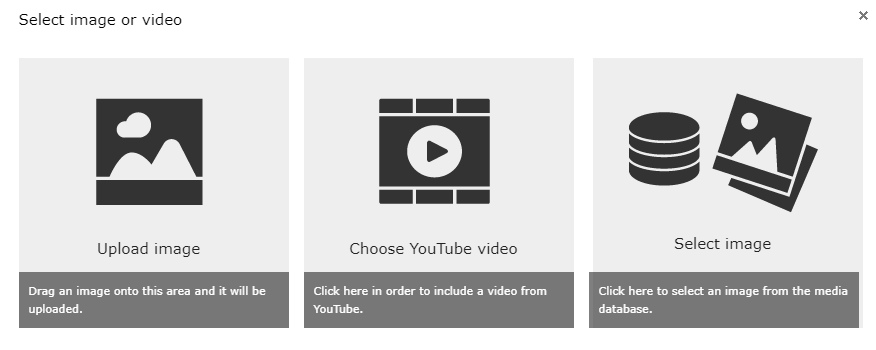
Further settings for your email campaign
You can find the ‚Settings‚ on the right side of the editing area. There you have the opportunity to configure fixed sections of the email campaign (e.g. table of contents, introduction, lead out). The available settings depend on the respective template.
You often can make the following settings:
- Fade in/out table of contents
- Fade in/out fixed buttons (e.g. Change profile)
- Fade in/out Social Media icons
- Insert pre header
Most email programs show the pre header underneath the subject line. Take this opportunity and take advantage of the limited space in order to strengthen the statement of your subject!
Some templates also hold the possibility ready to choose or adapt design settings that do not only refer to several sections.
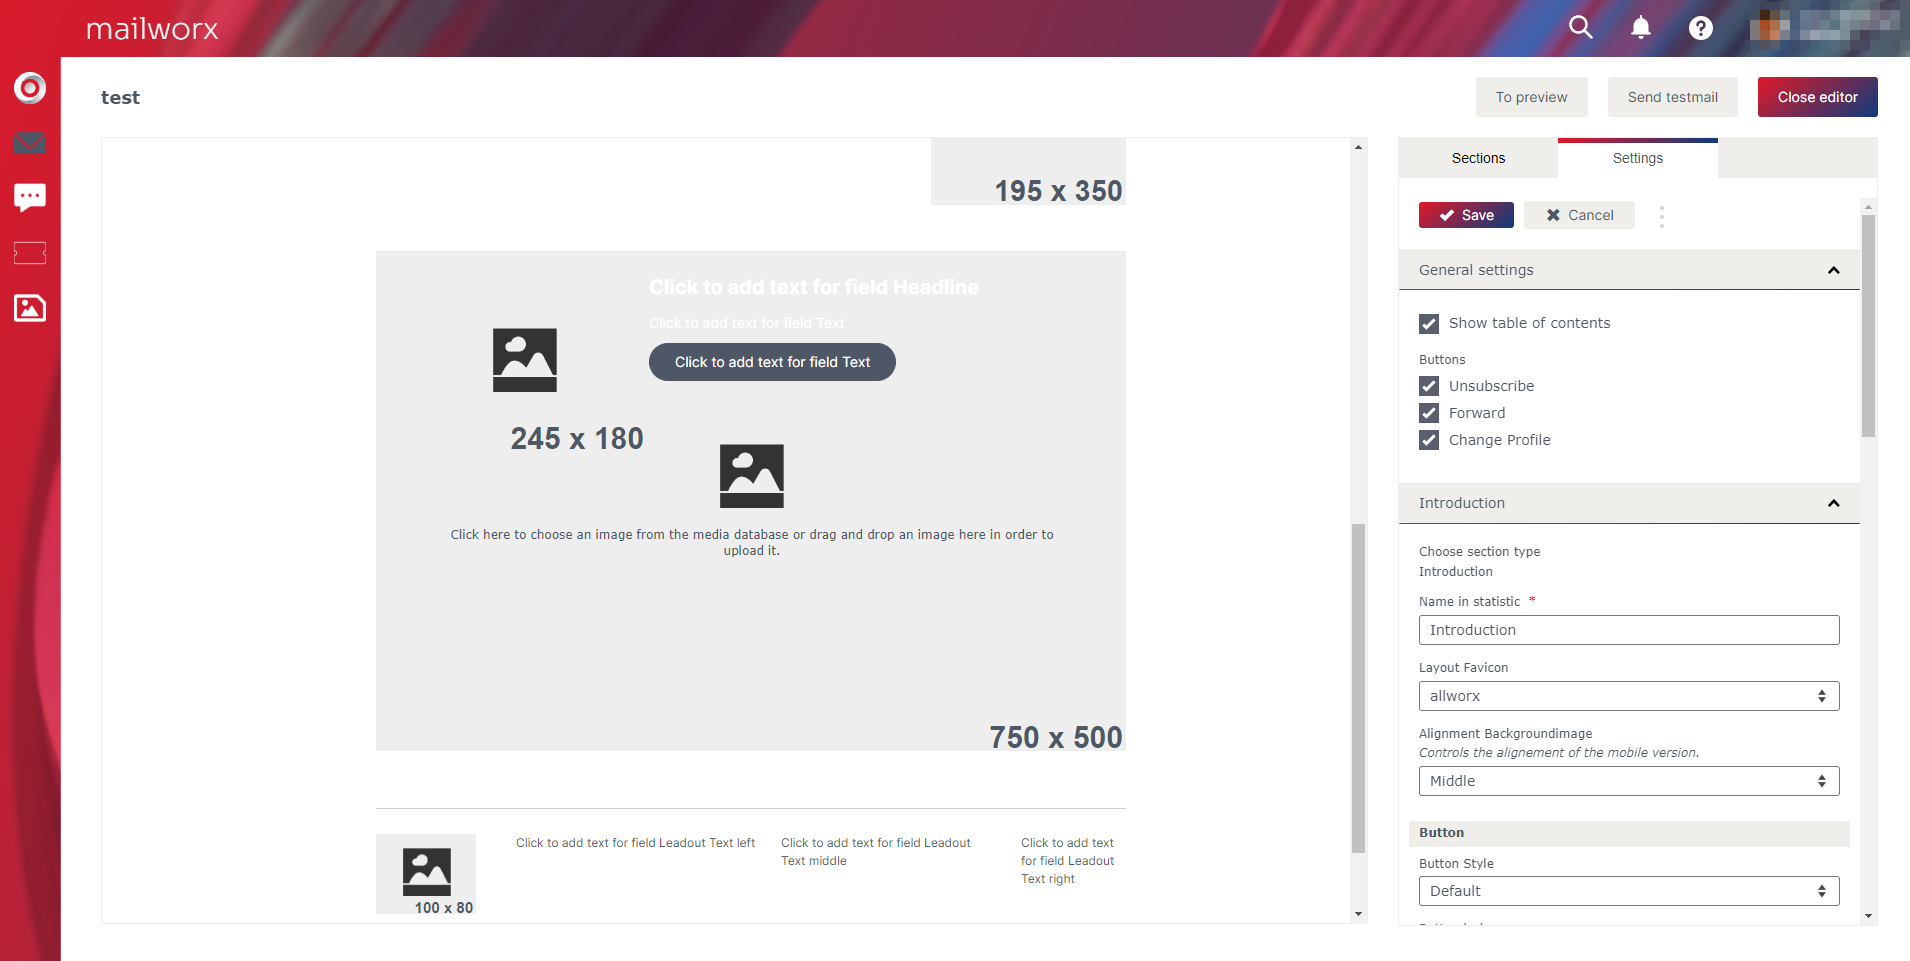
Futher settings of the campaign editor
In this tutorial we presented the most important basics of the mailworx editor. There are some more useful features for creating newsletters in order to ease your email marketing. Some of them are shown in our whitepapers.
Step 5: Choose the target group for your newsletter
In email marketing, addressing specific target groups with ones content is very important. This is why you have the opportunity to choose a pre-defined target group for your newsletter. Target groups can be either static or dynamic and are a central element in the structure of mailworx. Read the whitepaper ‚Subscriber groups‘ for more detailed information.
After choosing your target group, the eworx Marketing Suite automatically shows you the number of active recipients. This number is calculated from the recipients of the target group less the recipients that are excluded from delivery. Recipients can be excluded for many reasons. You can see them in the overview so you can understand the deviation. With the check boxes you have the choice whether to send to one or more excluded subscribers groups.
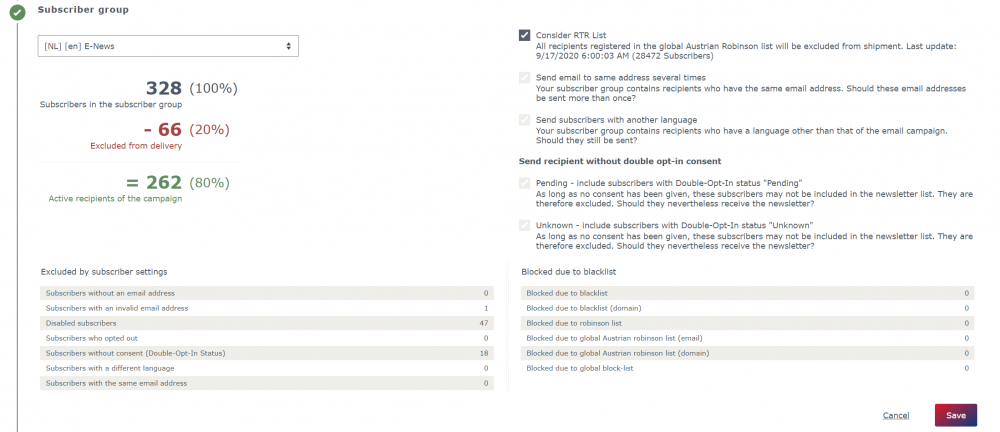
Multiple email addresses
Normally, the email address is the criterion which is used to align new to existing data. Nevertheless it can occur that recipients with the same email address get into the system, for example via import. Think about general company email addresses (e.g. office@mailworx.info) that are used for newsletter subscriptions. The eworx Marketing Suite assumes all this recipients, but discloses them as duplicates. The eworx Marketing Suite supports you in checking, whether there are duplicates or not, with the subscriber maintenance. It even assists you in adjusting them. If multiple subscribers use the same email address, you can include them for dispatch by activating the check box.
Take blacklists into account
Blacklists and robinson lists contain email addresses that don’t want to get newsletters for several reasons. Recipients that are registered in the global Austrian robinson list are excluded from delivery automatically.
Recipients of other language
Recipients that speak another language are automatically excluded from the delivery of a campaign in a divergent language.
Double-opt-in consent outstanding
Subscribers that did not (yet) consent that they want to get your newsletter, are automatically excluded from dispatch.
The eworx Marketing Suitedifferentiates between recipients that are still in the double-opt-in process and recipients that simply did not agree.
Step 6: Check your email campaign before dispatch
Before sending your newsletter, there is a check (Step 6) of all contents as well as settings that affect delivery or presentation of your campaign. The test results show what could be improved or rather which mistakes appeared.
You have the opportunity to see the single results in detail. The label in the traffic light system supports you in deciding, which problems should be prioritized.
Deliverability
In order to guarantee a reliable email delivery, the technical level has to be taken into account also. Important settings, for example setting the SPF records or activating DKIM, are checked before dispatch.
Links
This checks, whether the occuring links in your campaign are available. It is important to guarantee the accessibility so that incorrect links do not keep the recipient from interaction.
Spam check
Minimize the reasons for your email campaign to be handled as spam mail. The spam check uses a real anti spam service, which analyzes a real email. You can see the test results and get concrete tips how to optimize your newsletter content in order to reach best delivery results.
Length of subject line
This checks whether your subject line is going to be cut in some email programs. Do not forget to place the most important words at the beginning of your subject.
Personalisation
If you use personalized elements (e.g. salutation), it would be checked whether the recipients from your target group contain the respective data in order to display personalisation in the right way.
Dynamic content
With dynamic content you can restrict visibleness of sections to several target groups. Creating various similar email campaigns is unneccessary then. It will be checked whether there are sections in the campaign that can not be send to any recipient. The test was successful, if each recipient gets sections and each section can be send to at least one subscriber.
Take blacklists into account
Recipients that are listed on the global Austrian robinson list are excluded from dispatch automatically.
Invalid email addresses
Take the opportunity to correct typing errors before dispatch in order to send your newsletter to those recipients with an invalid email address.
Multiple email addresses
Email addresses that are assigned to multiple recipients are shown here. In step 5 ‚Target group‘, you can define if each one of these subscribers should get your email.
Recipients of other language
These subscribers will be excluded from dispatch by default. You can change this setting for your email campaign in step 5 ‚Target group‘.
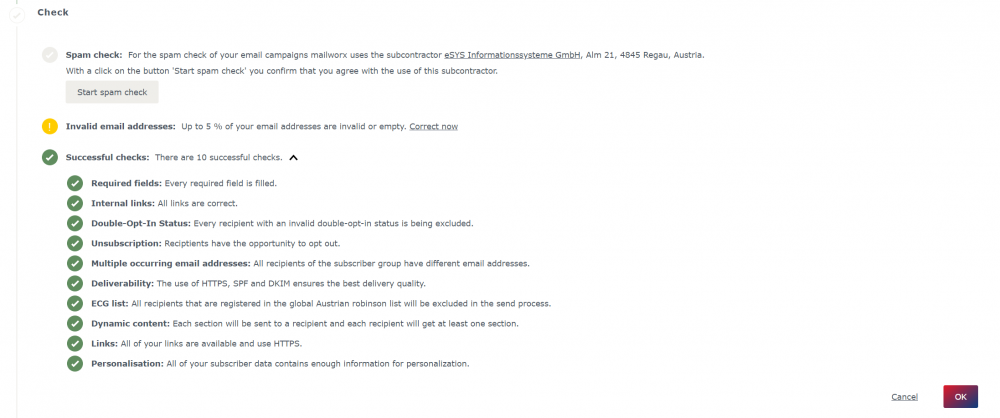
Step 7: Send your email campaign
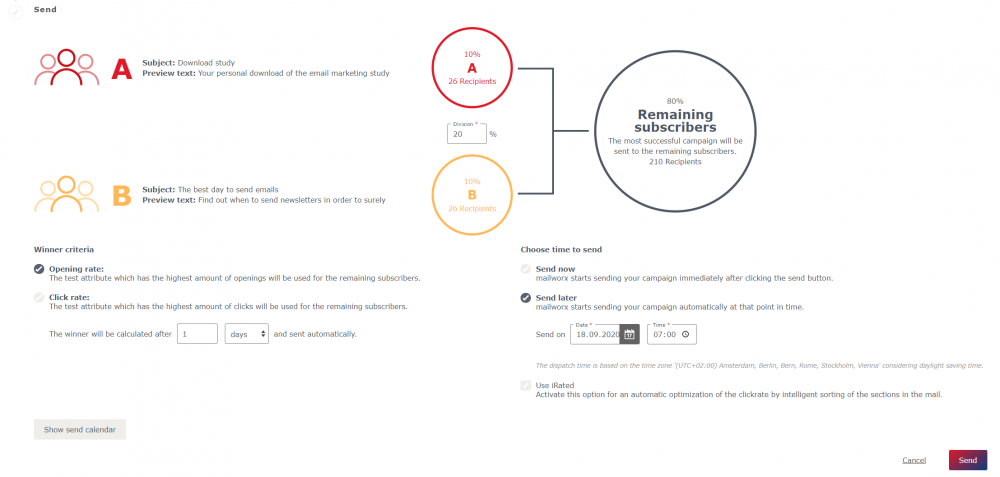
After successfully checking your campaign, you have to define the settings for dispatch. Which settings can be made in this step depends on the defined send type in step 1 ‚Settings‘. It is also taken into account whether you chose to do A/B testing in step 2 ‚Sender‘ or step 3 ‚Subject‘.
Settings for manual mailing
Delivery time
When choosing manual mailing for your email campaign, you can set the delivery time here. You can either send it now or plan to send it later on or in multiple batches of a pre-defined period of time. You do not have the last option if you are doing A/B testing.
iRated Technology
You also have the opportunity to optimize the performance of your newsletter with iRated. This technology sorts the newsletter sections depending on the respective subscriber’s interests. This increases opening as well as click rates of your newsletters.
Note: This option is not available for each template. Please contact the eworx Marketing Suite service crew for further information.
Settings for event dependent mailing
Event dependent campaigns are sent automatically to single subscribers after a certain event happened. mailworx differentiates between basic trigger mails, that can be created with the eworx Marketing Suite editor, and customized trigger mails, which use data from third party systems. We only talk about basic trigger mails in this case.
Basic trigger mails
One example for an event can be a certain date (birthday mailing) or sending a form (registration confirmation). In order to complete step 7 ‚Send‘, a form or an automation has to use the email campaign.

Overview over all email campaigns
Your last email campaigns can already be found on the start page of the eworx Marketing Suite system. By clicking the button ‚Edit‘, you directly get to the overview with the seven steps.
The overview over all existing email campaigns can be seen in the menu item ‚Campaigns‘. In this view you can filter as well as sort based on different criterions. You also see the status of the respective email campaign and can see how far you came in creating the newsletter based on the seven steps.
Available filters
Following filters can be set in the email campaign overview.
- State: Draft, Ready to send, Sent, Archive
- Send type: Manual, Event dependent
- Language
- Newsletter Type (This value is empty if you don’t use this function)
- Template
Managing existing campaigns
In this view you can edit, copy and delete existing campaigns. If you want to archive an email campaign, you simply have to click the button ‚Edit‘ and change the state to ‚Archive‘.
Search for email campaigns
You can also search for a campaign in the overview over your email campaigns. It is also possible to use the system-wide search which can be found in the main navigation. This one also extends to all target groups, forms, landing pages and even subscribers.
